Good Affordable 3D Printers: How to Spot a Reliable Budget Machine
The best affordable 3D printer depends on your main constraint: reliability out of the box, build volume for the price, or willingness to tinker. In the $200–$500 range, no single printer does everything well. Below we lay out the real trade-offs, flag where common recommendations fail, and give you a concrete way to pick the right machine.
affordable 3d printers” />
What “Good Affordable” Actually Means for a 3D Printer
“Affordable” usually means under $500, but within that bracket you’re making hard trade-offs between print quality, ease of use, reliability, and upgrade potential. A “good” printer for a hobbyist who enjoys tweaking is a bad choice for someone who just needs functional parts with minimal fuss.
When the answer changes
If you intend to print food-contact items, skip the entire budget segment. No certified food-safe filament exists for FDM printers under normal conditions—layer lines and hotend materials trap bacteria, even with a stainless steel nozzle. For engineering materials like nylon or polycarbonate, avoid any printer with a PTFE-lined hotend (stock Ender 3, Anycubic Kobra base model). You’ll need an all-metal hotend upgrade or a printer like the Ender 3 S1 (which comes with one). For parts larger than 200 mm in a single piece, the Prusa Mini+ and Bambu Lab A1 Mini are simply too small—go with the Kobra 2 or an Ender 3 variant.
What that means for your next move
If you are a beginner who wants successful prints from day one, your best bet is the Anycubic Kobra 2 or the Bambu Lab A1 Mini. Expect 30 minutes of setup and the first layer to stick on the first try. If you plan to mod extensively and don’t mind spending a week of evenings calibrating, the Ender 3 S1 is cheaper but will force you to learn the machine inside out. The Prusa Mini+ sits in the middle—reliable and well-supported but expensive for its small build volume.
How to verify fit on the actual machine
Before buying, check two things on the spec sheet or in unboxing reviews:
- Auto-bed leveling sensor type. A limit-switch style only detects the bed at one point; it won’t compensate for a warped build plate. Inductive or strain-gauge sensors (found on the Kobra 2, Prusa Mini+, and A1 Mini) measure multiple points and adjust on the fly.
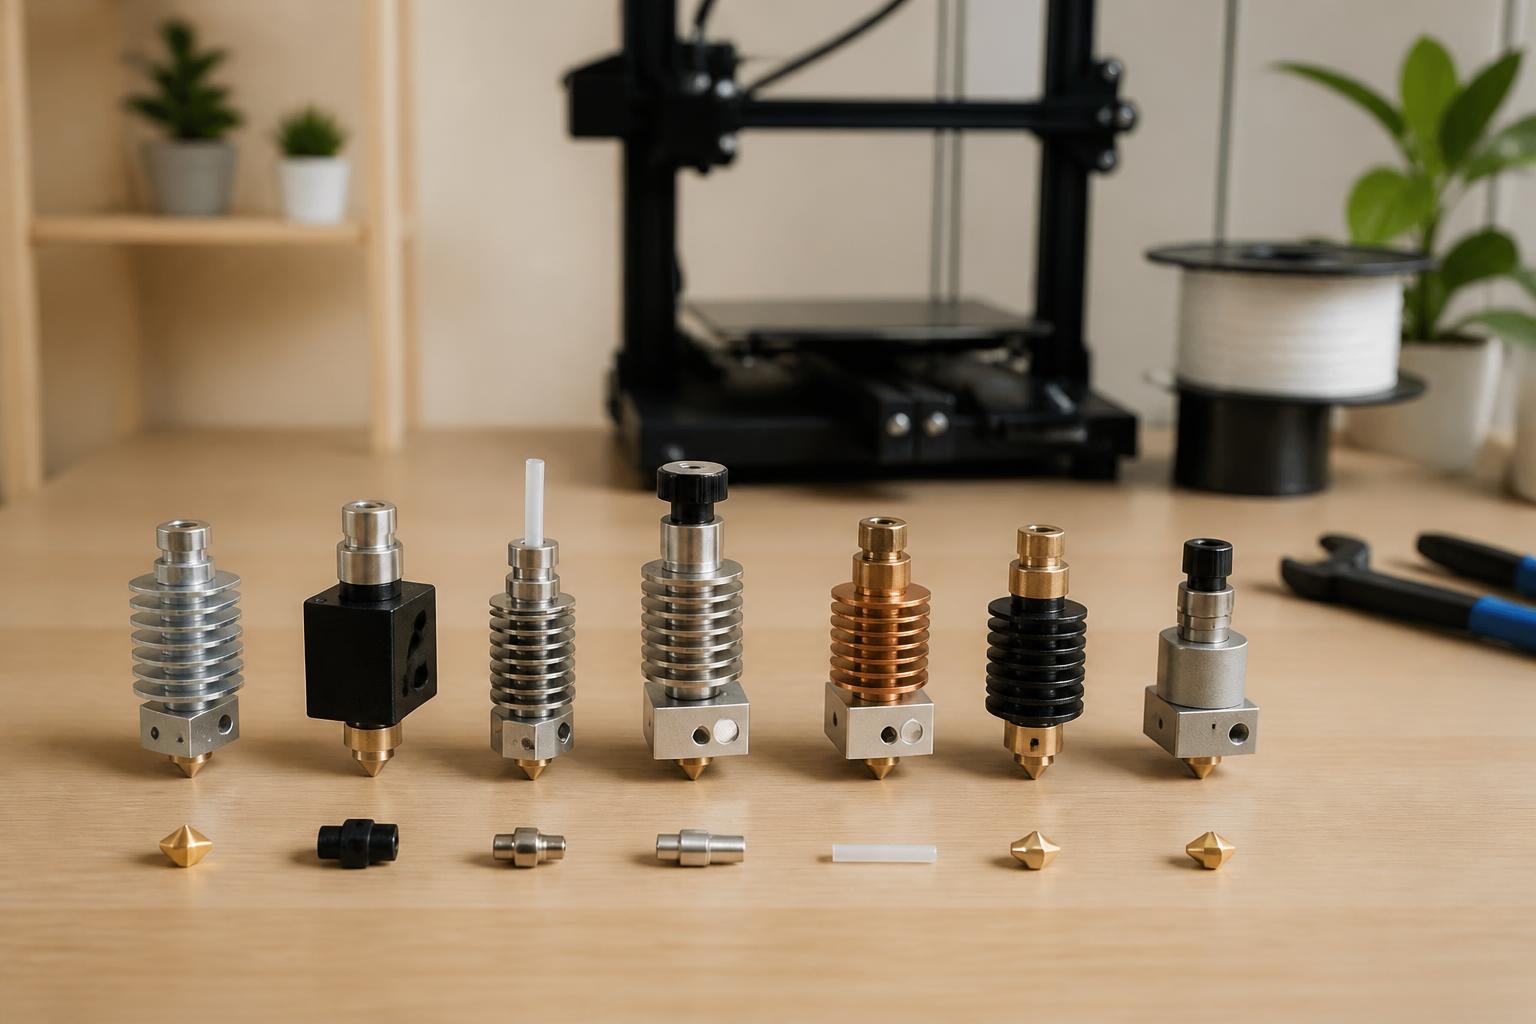
- Hotend tube material. If the printer uses a PTFE liner (common in the $200 range), max nozzle temperature is around 240 °C—enough for PLA/PETG but not for nylon, polycarbonate, or high-temp PLA. All-metal hotends (Ender 3 S1, Prusa Mini+) let you go to 260 °C+ without degradation.
Real Trade‑Offs in the $200–$500 Range
Here are the models that consistently balance price with real-world performance, along with their concrete trade-offs and owner-help details.
Creality Ender 3 V2 / Ender 3 S1 – The Tinkerer’s Standard
Price: $200–$350
Build volume: 220 × 220 × 250 mm
Print quality: Good at 50–60 mm/s, but requires manual bed leveling (V2) or auto-leveling (S1) and periodic frame tightening.
Strengths: Massive community support, cheap parts, huge upgrade ecosystem (direct drive, all-metal hotend, linear rails).
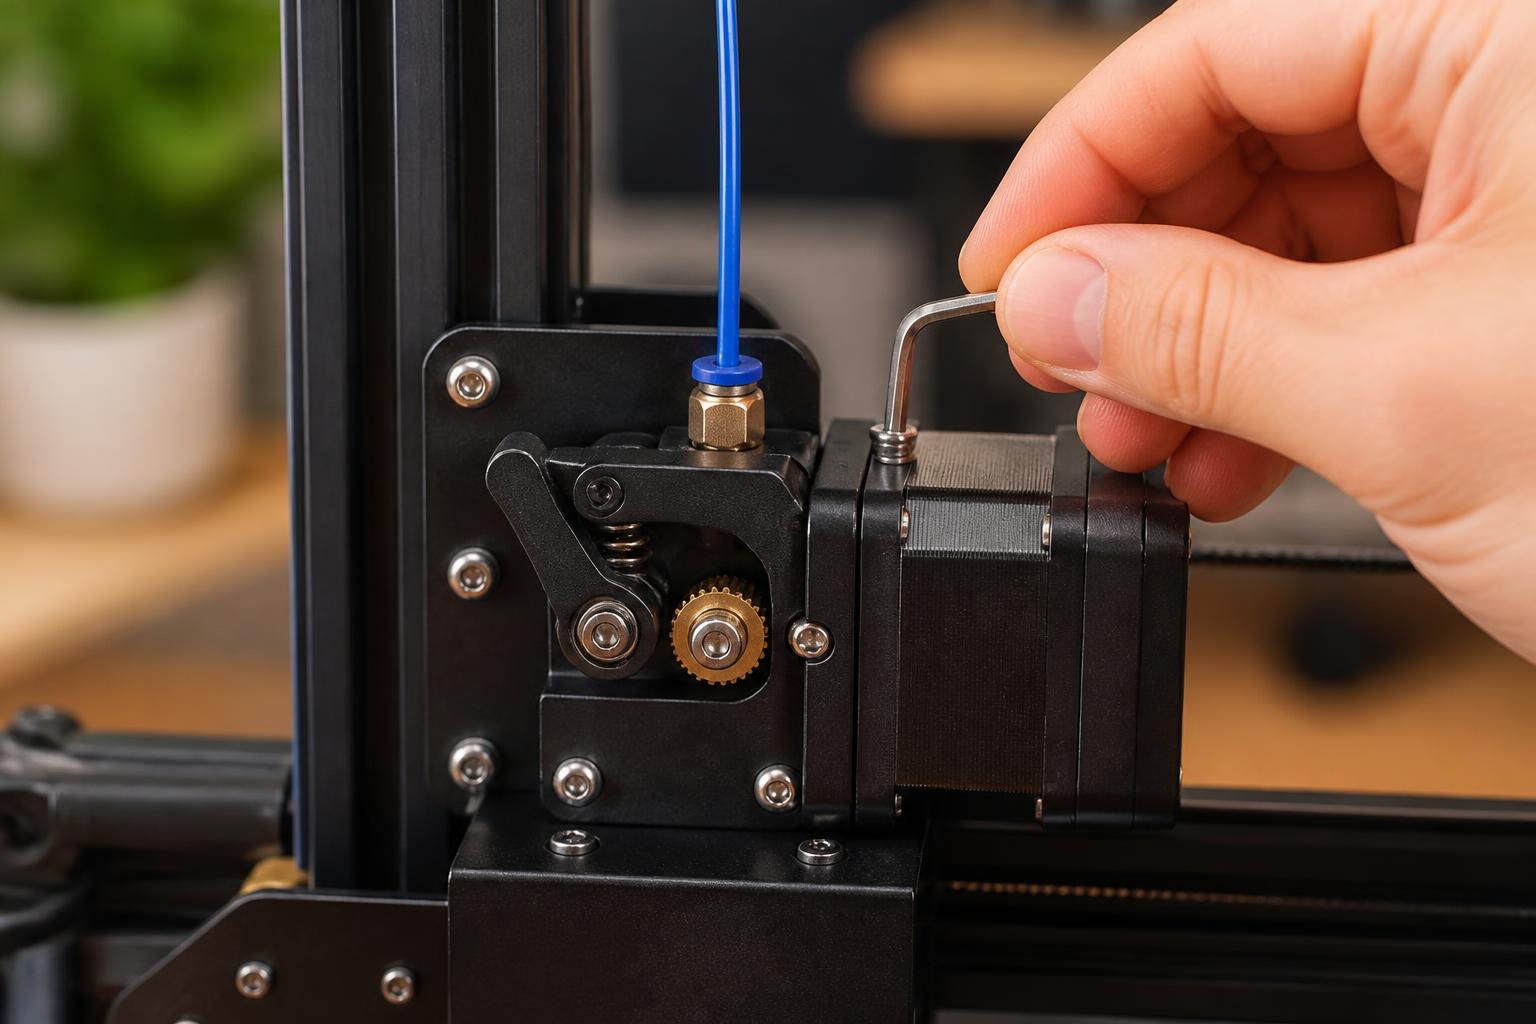
Weaknesses: Out‑of‑box reliability is mediocre. Common complaints include warped beds (check with a straightedge—many ship with a dip in the center), loose belts, poor factory assembly. You will spend your first few prints diagnosing Z‑offset and adhesion. The V2’s stock extruder tension arm is prone to cracking after a few hundred hours—check for hairline cracks on the idler arm lever.
Best for: Users who want to learn the machine inside and out and don’t mind spending 2–3 hours setting it up properly.
Anycubic Kobra / Kobra 2 – The “Just Works” Budget Pick
Price: $250–$400
Build volume: 220 × 220 × 250 mm (Kobra); 250 × 220 × 220 mm (Kobra 2)
Print quality: Clean at 60 mm/s; the Kobra 2 can push 150 mm/s without major quality loss thanks to a lightweight print head.
Strengths: Factory‑calibrated auto‑bed leveling (inductive sensor), direct‑drive extruder on the Kobra 2, PEI spring steel bed that sticks well. Much less fiddling than the Ender. One common issue: on high‑retraction prints (e.g., multiple small objects), the direct-drive can skip; reduce retraction distance to 0.8 mm.
Weaknesses: Fewer upgrade options; the proprietary hotend limits nozzle swaps. Fan noise can be loud. The stock Bowden tube on the base Kobra can cause heat creep if you print slow in an enclosed space.
Best for: Beginners or users who want reliable prints without spending weekends tweaking.
Prusa Mini+ – The “Buy Once, Cry Once” Option
Price: $429 (kit), $499 (assembled)
Build volume: 180 × 180 × 180 mm
Print quality: Excellent. Prints PLA, PETG, and TPU reliably at 0.20 mm layer height with minimal artifacts.
Strengths: Proven Prusa firmware, auto‑bed leveling (inductive sensor), excellent support, open‑source parts. Holds calibration for months. The PTFE tube inside the hotend can degrade above 250 °C—replace with Capricorn tubing if you plan to print high‑temp PETG regularly.
Weaknesses: Small build volume; slow (max recommended speed ~80 mm/s). The price is high for the size. No integrated enclosure; printing ABS requires an aftermarket tent.
Best for: Users who value uptime and support over large prints or raw speed.
Bambu Lab A1 Mini – The Speed Demon
Price: $299 (base), $449 (with AMS lite for multi‑material)
Build volume: 180 × 180 × 180 mm
Print quality: Very good at high speeds (up to 300 mm/s with realistic acceleration). Layer lines are consistent.
Strengths: Fast prints out of the box, quiet operation, built‑in camera, automatic flow calibration. The PEI textured bed grips PLA and PETG well without glue.
Weaknesses: Proprietary parts (nozzle, build plate) cost more to replace. The small bed limits functional prints. The A1 Mini uses a Bowden‑style PTFE tube, which can cause heat creep when printing slow with PLA; keep the printer open and avoid enclosed spaces. The hotend fan is not user‑serviceable—if it fails, you may need to replace the entire print head assembly.
Best for: Users who prioritize speed and don’t need a large printable area.
| Printer | Price Range | Build Volume | Ease of Use | Print Speed (practical) | Upgrade Potential | Best For |
|---|---|---|---|---|---|---|
| Ender 3 V2/S1 | $200–$350 | 220×220×250 mm | Low (manual leveling) | 50–80 mm/s | Very high | Tinkerers, modders |
| Anycubic Kobra 2 | $250–$400 | 250×220×220 mm | High (auto‑level, direct drive) | 80–150 mm/s | Moderate | Beginners, reliable prints |
| Prusa Mini+ | $429–$499 | 180×180×180 mm | Very high (Pro support) | 50–80 mm/s | Medium (mostly stock) | Print‑quality fanatics |
| Bambu Lab A1 Mini | $299–$449 | 180×180×180 mm | High (auto‑everything) | 150–300 mm/s | Low (proprietary) | Speed‑focused users |
Where Common Recommendations Fall Short
The most parroted budget advice is “get an Ender 3.” That worked in 2019, but today the Ender 3 V2 needs serious calibration before it prints reliably. Many first‑time buyers return the machine because they can’t get the bed level or the first layer won’t stick. The V2’s stock extruder tension arm cracks after a few months—a well‑known failure that the community has documented extensively.
Another pitfall: “bigger build volume = better.” A 300 × 300 mm bed on a $300 printer usually means the frame lacks stiffness, the Y‑axis is heavy, and you’ll get ringing at moderate speeds. For functional parts under 200 mm, a smaller rigid printer like the Prusa Mini+ or A1 Mini actually produces faster prints because the lighter gantry can accelerate harder without vibration artifacts.
Finally, watch for misleading “auto‑bed leveling” claims. Some older Ender models ship with a limit‑switch probe that only detects the bed at one point—it doesn’t compensate for a warped build plate. The inductive sensors on the Kobra 2 and Prusa Mini+ measure multiple points and adjust the print head height on the fly. If a budget printer doesn’t specify the sensor type, assume it’s a single‑point switch.
Which One Should You Pick? A Fast Fit Guide
Decide based on your primary constraint:
- You want to learn 3D printing and aren’t afraid of adjustments: Choose the Ender 3 S1 (the auto‑level version avoids the worst headache). Be prepared to spend your first weekend tuning. Run a bed mesh print (a 5×5 grid) to check if the bed is warped; if corner Z values differ by more than 0.2 mm, manually tram the bed or replace it with a glass sheet.
- You want reliable parts without tinkering: Choose the Anycubic Kobra 2. It’s the current sweet spot for price vs. out‑of‑box performance. Reduce retraction to 0.8 mm if you see skipping on small parts, and keep the print speed under 120 mm/s for best quality.
- You need consistent quality for small prototypes or customer samples: Choose the Prusa Mini+. The extra cost pays for months of uptime and responsive support. Replace the PTFE tube with Capricorn tubing before printing high‑temp PETG to avoid the liner degrading over time.
- You care mostly about speed and don’t need large prints: Choose the Bambu Lab A1 Mini. Just factor in slightly higher replacement‑part costs and avoid printing slow with PLA in an enclosed space to prevent heat creep. The AMS lite unit is worth the extra $150 if you want multi‑color prints without swapping filament manually.
What to Do Next
1. Verify your primary material and part size. If you’re printing PLA-only under 180 mm, the Prusa Mini+ or A1 Mini are safe bets. For larger functional PETG prints, the Kobra 2 gives you the best mix of size and simplicity. Avoid the Ender 3 unless you’re ready to treat the printer as an ongoing project.
2. Before your first real job, run a temperature tower and a flow‑rate calibration print. That single hour of calibration saves days of failed prints. Most slicers have built‑in calibration wizards—use them.
3. Check for common factory issues. On the Ender 3 S1, press the extruder idler arm while printing—if filament slips, the tensioner is cracked. Replace it with an aluminum arm ($10 mod). On the Kobra 2, verify that the PEI sheet is clean (wipe with isopropyl alcohol before every print). On the Prusa Mini+, run a PID auto‑tune for the hotend if the temperature fluctuates more than ±2 °C.
4. Watch for these failure modes:
- Persistent first‑layer issues (parts lifting or not sticking) → check Z‑offset, bed temperature (60 °C for PLA, 70 °C for PETG), and bed adhesion (use a brim if needed).
- Stringing that doesn’t clear with retraction adjustments → check nozzle for wear (a brass nozzle starts showing stringing after 200 g of abrasive filament like glow‑in‑the‑dark). Switch to a hardened steel nozzle.
- Heat creep (filament jams midway through a print) → on Bowden‑style printers (Ender 3 V2, A1 Mini), verify the hotend fan is spinning and that you’re not printing too slow (<30 mm/s) with high retraction.
5. Escalation signal. If you’ve calibrated Z‑offset, run a temperature tower, and still get warping or layer adhesion failures, the issue is likely a faulty thermistor or a clogged nozzle. Replace the nozzle first ($5) and retry. If the problem persists, check the hotend thermistor resistance with a multimeter (100 kΩ at room temperature). If it reads open or wildly off, replace it before printing again.
Once you have the right printer for your constraint and have run basic calibration, you can expect consistent prints for months with minimal intervention. The affordable 3D printer market has improved dramatically—choose the one that matches your willingness to tinker, not just the lowest price tag.
Explore This Topic
- Back to Best Printer by Budget
- Back to sc0017
Related guides in this cluster:

Ryan has been operating FDM 3D printers since 2017. He runs a 12-machine print farm. His daily drivers include a Bambu Lab X1 Carbon, Prusa MK4s, and Creality Ender-3 V3s that have logged over 15000 print hours. He started 3D Printer Nerd to provide structured troubleshooting guides with diagnostic order, material-specific parameters, and clear stop points.