3D Print Blobs & Zits: Retraction & Coasting Fix Guide
The most likely cause of blobs and zits on your 3D print is inconsistent extrusion pressure combined with poor retraction timing. When your printer pauses at layer changes, moves between features, or struggles to restart filament flow cleanly, excess plastic leaks out and leaves small bumps on the surface. The fix starts with tuning retraction distance and speed, then layering in coasting if blobs persist at seam points.
This guide walks through the checks and adjustments in order of likelihood, from the quickest slicer changes to the mechanical inspections that matter when software fixes stop helping.
First: Identify Whether You Have Blobs, Zits, or Something Else
Before changing any settings, confirm the defect matches the right fix. Different surface flaws need different corrections.
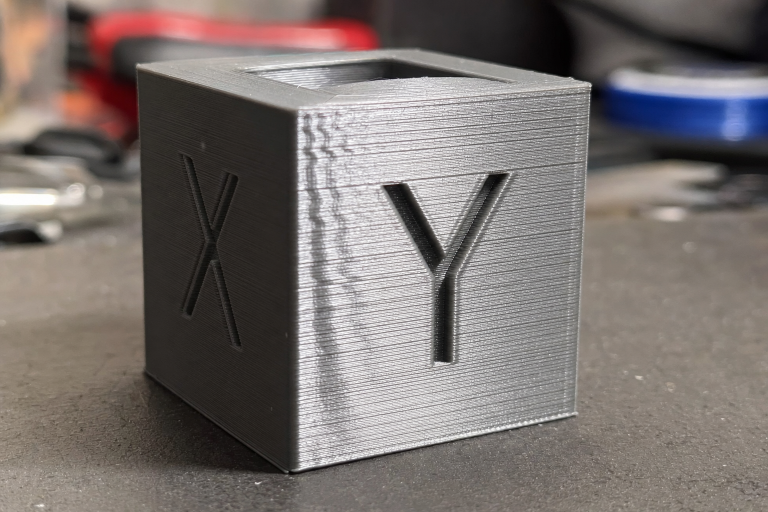
Blobs look like small rounded bumps, often concentrated at layer start/stop points or scattered randomly across the print surface. They feel solid and sit proud of the surface. These come from over-extrusion at seam points or oozing during travel moves.
Zits are smaller, more frequent surface bumps that appear in a pattern or randomly. If they appear in a regular vertical line, they are almost always seam-related. If they appear randomly, suspect wet filament popping, inconsistent extrusion, or a partial nozzle clog.
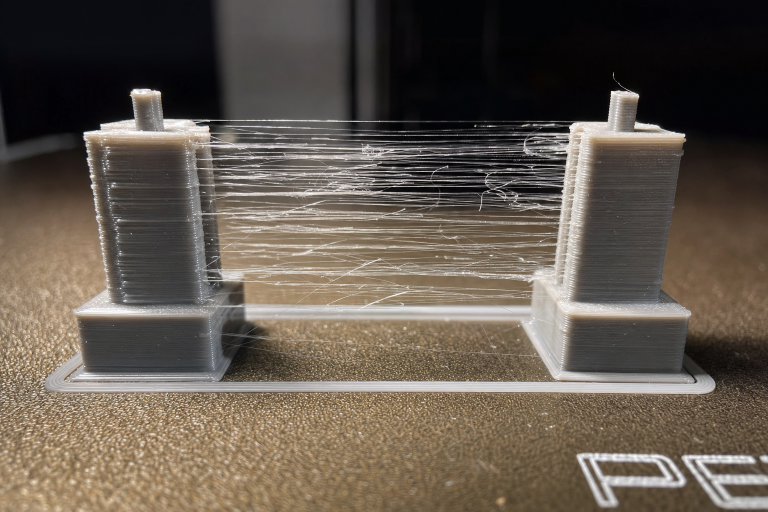
Thin stringing is a different defect: fine hair-like filaments stretched between features. That is mild oozing from slightly high temperature or low retraction. Blobs and zits are the heavier cousin: enough plastic escaping to form a visible bump, not just a wisp.
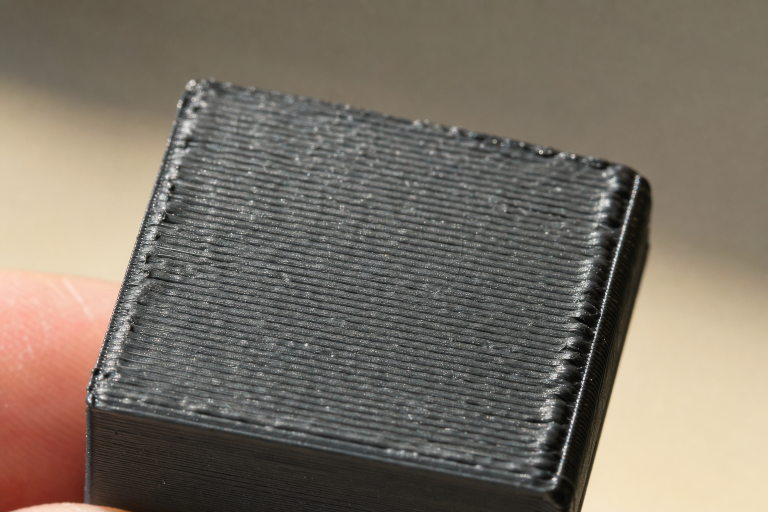
Action: Look at your print under good light. Run a fingernail over the bumps. If they scrape off as solid dots, you are in the right place. If the surface feels rough and sandy instead, you may be dealing with over-extrusion across the entire print, which needs flow rate calibration first.
Quickest Fix: Tune Retraction Distance and Speed
Retraction pulls filament back into the nozzle during travel moves to relieve pressure and stop oozing. If retraction is too short or too slow, plastic keeps leaking out while the nozzle moves, leaving blobs at the start and end of each extrusion path.
Retraction Distance
Start with small increments. Too much retraction pulls molten filament into the cold zone and causes jams.
| Printer Type | Starting Range | Adjustment Increment | Max Before Risk |
|---|---|---|---|
| Direct drive | 0.5–2.0 mm | 0.5 mm | 3.0 mm |
| Bowden setup | 3.0–6.0 mm | 1.0 mm | 8.0 mm |
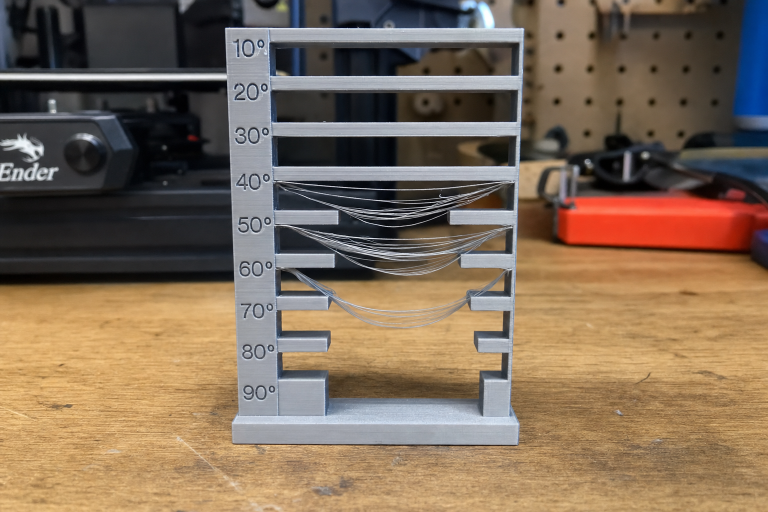
Verification: Print a retraction test tower. Look at the seam after each distance change. A clean seam with no blob means you are close. If blobs shrink but do not disappear, increase distance by one increment and re-test.
Retraction Speed
Retraction speed controls how fast the filament pulls back. Too slow and pressure bleeds off gradually, letting plastic ooze during the travel move. Too fast and the extruder gear can strip filament or skip steps.
- Direct drive: Start at 25–40 mm/s. Increase in 5 mm/s steps.
- Bowden: Start at 40–60 mm/s. Increase in 5 mm/s steps.
Verification: After setting distance, print the same test model at increasing retraction speeds. Watch for diminishing returns: if blobs stop improving but you start hearing extruder clicking, back off by 5 mm/s.
Branch point: what to do when retraction tuning alone does not fix it. After you have tested the full retraction distance and speed range for your printer type, stop and inspect the seam again. If blobs are smaller but still present only at the seam, the next step is adding coasting. If blobs are unchanged in size or appear randomly across the print rather than at the seam, skip coasting and go directly to the temperature and wet filament checks below. Continuing to push retraction distance past the maximums in the table risks a hotend jam that requires disassembly, so do not exceed those limits.
When Blobs Appear Only at the Seam: Add Coasting
Coasting stops extrusion slightly before the end of a print line, letting residual nozzle pressure finish the line naturally. This prevents a blob from forming at the exact point where the nozzle lifts or changes direction.
Enable coasting in your slicer:
- Cura: Enable “Coasting” under Experimental settings.
- PrusaSlicer/SuperSlicer: Enable “Wipe while retracting” as an alternative; coasting is less directly exposed.
- Simplify3D: Enable “Coast at end” under the Extruder tab.
Coasting volume settings:
- Start with a coasting volume of 0.064 mm³ (roughly the volume of a 0.4 mm nozzle orifice).
- Increase in 0.02 mm³ increments if the seam still shows a blob.
- Decrease if you see gaps or under-extrusion at the seam.
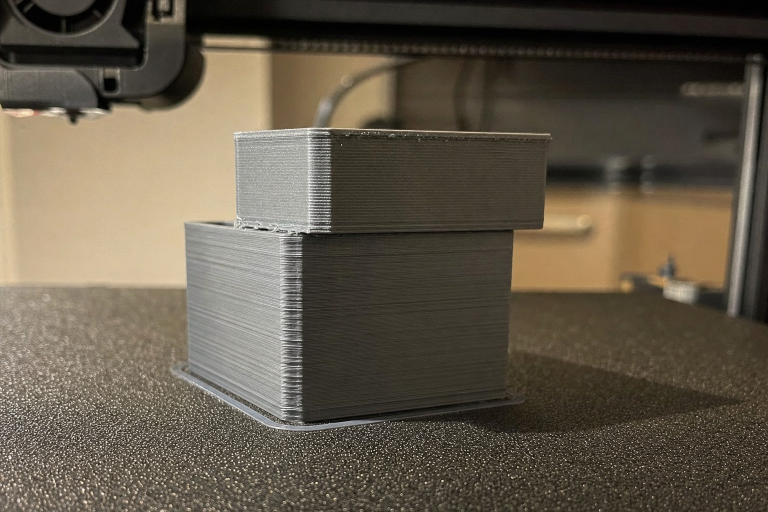
Verification: Print a cylinder or cube with a single aligned seam. Inspect the seam line. A correctly tuned coast leaves a barely visible seam line with no raised bump and no gap. If you see a small divot or gap at the seam, coasting volume is too high; reduce it by 0.02 mm³ and reprint. If the blob is smaller but still raised, increase coasting volume by 0.02 mm³. Stop adjusting when the seam is flush with the surface or when further changes produce a gap, whichever comes first.
Temperature: The Hidden Amplifier
High nozzle temperature makes filament less viscous, so it oozes more easily during travel moves. Even well-tuned retraction struggles if the temperature is too high for the material.
Check your current temperature against material norms:
| Material | Typical Range | Start Test At |
|---|---|---|
| PLA | 190–220°C | 200°C |
| PETG | 220–250°C | 235°C |
| ABS | 230–260°C | 245°C |
| TPU | 210–240°C | 225°C |
Action: Print a temperature tower that changes temperature every 5–10 mm of height. Look at the section with the cleanest surface and least blobbing at seams. Use that temperature for your next retraction test.
Decision criterion: If you need high temperature for layer adhesion or strength (functional parts in PETG or ABS), prioritize retraction and coasting tuning over dropping temperature. If you are printing decorative PLA models where strength does not matter, drop temperature by 5°C first and see if blobs clear up without touching other settings.
Wet Filament: The Random Blob Generator
Moisture absorbed by filament turns to steam in the hotend, popping out as irregular surface bumps that look like zits. These appear randomly, not just at seams.
Symptoms that point to wet filament:
- Popping or hissing sounds during extrusion
- Random zits scattered across the print, not aligned to seams
- Stringing that gets worse even after retraction tuning
- Filament that snaps easily when bent (PLA) or feels brittle
Fix: Dry the filament before further tuning.
- PLA: 45–50°C for 4–6 hours
- PETG: 60–65°C for 4–6 hours
- ABS: 70–80°C for 4–6 hours
- TPU: 50–55°C for 6–8 hours
Use a filament dryer, food dehydrator, or heated bed with a cardboard box enclosure. Do not use an oven unless it can hold a stable low temperature; most kitchen ovens overshoot and ruin filament.
Verification: After drying, print the same model that showed random zits. If the zits are gone or significantly reduced, wet filament was the cause. Store filament in sealed containers with desiccant going forward. If random zits persist after drying, move to the mechanical checks below; the issue is not moisture-related.
Mechanical Checks When Slicer Fixes Stop Working
If retraction, coasting, and temperature tuning do not resolve the blobs, the problem is likely mechanical.
Check the Bowden Tube (Bowden Setups Only)
A loose Bowden tube fitting creates a dead zone where the tube moves inside the coupler during retractions. The filament retracts less than the slicer commands, and blobs persist no matter what settings you use.
Test: Mark the Bowden tube with a marker at both couplers. Command a 5 mm retraction. Watch the marks. If either mark moves relative to the coupler, the fitting is loose or the tube is worn.
Fix: Replace the PTFE tube and couplers if there is any play. Cut the tube end perfectly square. Push it fully into the hotend coupler before locking.
Check Extruder Tension and Gear Condition
A slipping extruder gear cannot pull filament back cleanly during retraction. Look for:
- Filament dust or shavings around the extruder
- A worn groove in the brass drive gear
- Loose tension arm on plastic extruder assemblies
Fix: Clean the gear teeth with a brush. Increase tension slightly if the arm is adjustable. Replace brass gears that show a visible wear groove. If your printer has a stock plastic extruder arm, inspect it for cracks; this is a common failure point on Creality-style machines.
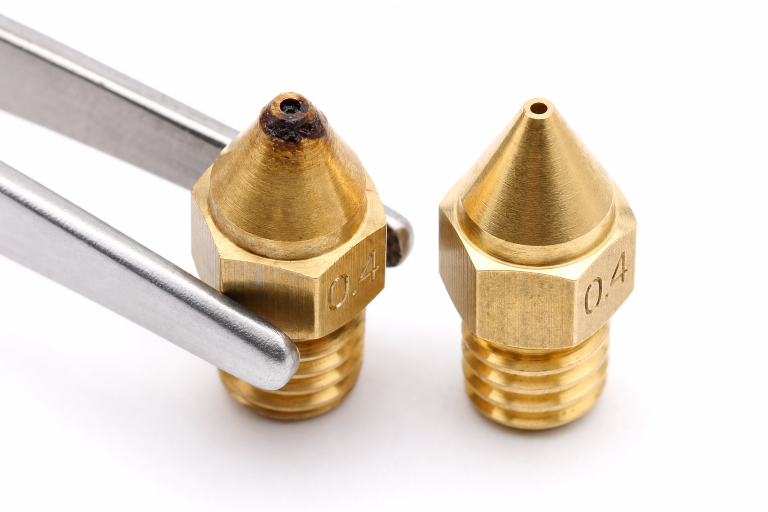
Check for a Partial Nozzle Clog
A partial clog creates inconsistent extrusion pressure. Flow surges and drops, leaving random blobs where pressure spikes.
Test: Heat the nozzle to printing temperature. Manually push filament through by hand. It should extrude straight down with consistent thickness. If it curls sharply, extrudes thin, or requires high force, the nozzle is partially blocked.
Fix: Perform a cold pull (atomic pull) or replace the nozzle. Nozzles are consumable; if you have printed abrasive filament or have more than 300–400 hours on a brass nozzle, replacement is the more reliable fix.
When to Stop and Escalate
Stop self-troubleshooting and check with your printer manufacturer or a qualified repair service if:
- Blobs persist after all slicer and mechanical checks above, and you cannot isolate the cause to a specific setting or part.
- The extruder motor skips steps or makes grinding noises during normal extrusion, not just during retraction. This suggests a stepper driver or mainboard issue.
- Blobs are accompanied by layer shifts or inconsistent layer stacking. This points to motion system problems (loose belts, worn V-wheels, bent Z-rod) that retraction tuning cannot fix.
- You see scorched or darkened blobs. This indicates filament sitting in the hotend too long and burning, which can mean heat creep or a hotend cooling fan failure. Continuing to print with heat creep risks a full hotend jam that requires disassembly; stop and resolve the cooling issue first.
Preventing Blobs and Zits Long-Term
Once your prints are clean, lock in the fix with a few habits:
- Save a tuned profile per material and nozzle size. Do not reuse PLA retraction settings for PETG or TPU.
- Dry filament before first use, even if it is fresh from the package. New filament is not guaranteed dry.
- Replace nozzles on a schedule, not just when prints fail. Brass nozzles wear gradually and inconsistently.
- Check Bowden fittings monthly if you run a Bowden setup. The couplers are wear items.
- Re-run a retraction test tower after any firmware change, extruder swap, or hotend rebuild.
Explore This Topic
- Back to Print Quality Defects
- Back to 3D Printing Troubleshooting Master Guide
Related guides in this cluster:
- Layer Shift: Causes & Complete Fix Guide for 3D Printing
- Z-Banding: Diagnose & Fix Inconsistent Layers
- Ghosting & Ringing: How to Eliminate Surface Artifacts
Ryan has been operating FDM 3D printers since 2017. He runs a 12-machine print farm. His daily drivers include a Bambu Lab X1 Carbon, Prusa MK4s, and Creality Ender-3 V3s that have logged over 15000 print hours. He started 3D Printer Nerd to provide structured troubleshooting guides with diagnostic order, material-specific parameters, and clear stop points.