How to Fix a Clogged 3D Printer Nozzle: Cold Pull & Complete Guide
The most likely cause of a clogged nozzle is burnt filament residue or tiny debris that accumulates inside the nozzle and heat break over time, especially after switching materials or printing at the high end of a filament’s temperature range. The fastest, most reliable fix is a cold pull — a technique that uses controlled heating and cooling to yank the blockage out in one piece. This guide walks you through the full process, from confirming it’s really a clog to preventing it from happening again, with concrete settings and a counter-intuitive trick that most generic articles skip.
Quick Checks: Is It Really a Clog?
Before you tear down the hotend, rule out other problems that mimic a clog.
- Visual inspection: Look at the nozzle tip while the printer is idle and heated. If filament oozes out in a thin, straight line, the nozzle is likely clear. If it curls sharply, barely extrudes, or nothing comes out, a partial or full clog is probable.
- Extruder clicking/skipping: A rhythmic clicking sound from the extruder motor means the filament can’t be pushed through the hotend. This often points to a clog, but can also be caused by printing too cold or too fast.
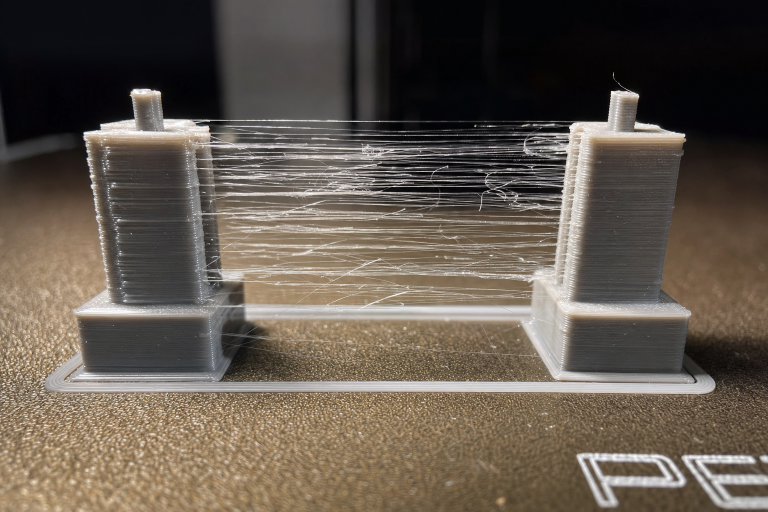
- Under-extrusion pattern: Thin, missing lines in the first layer or gaps in top surfaces that appear consistently across multiple prints suggest a partial clog, not just a slicer setting.
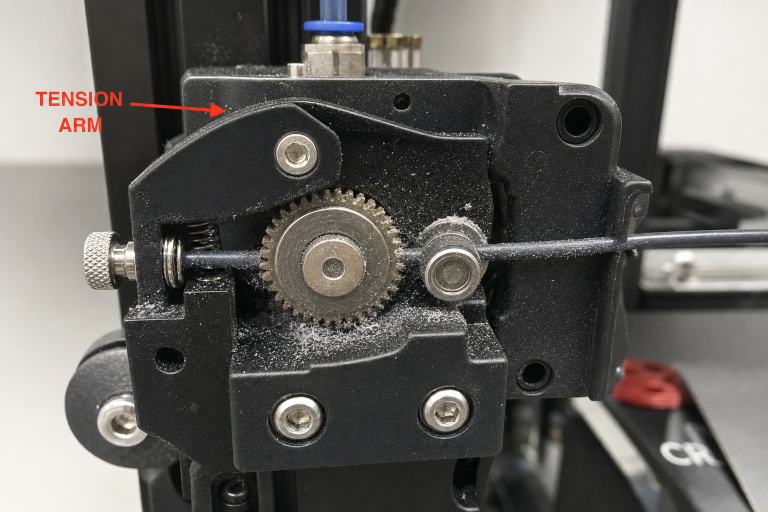
- Manual push test: Heat the nozzle to the filament’s printing temperature, release the extruder tension arm, and try to push filament through by hand. If you feel strong resistance or nothing comes out, a clog is confirmed.
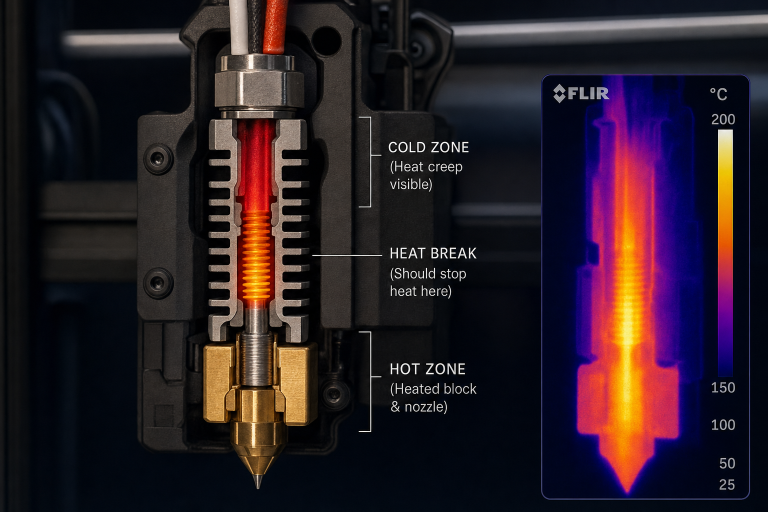
Branch point — what you find changes your next move: If the filament feeds smoothly by hand but the extruder still clicks, the issue is likely extruder tension, a cracked tension arm, or heat creep — not a nozzle clog. In that case, skip the cold pull entirely. Check the extruder arm for hairline cracks (common on plastic Creality-style extruders), tighten the tension screw, and verify the hotend cooling fan runs at full speed. If the extruder motor feels hot to the touch mid-print, you’re dealing with heat creep: the filament is softening too early in the heat break and jamming. Address the fan or reduce retraction distance before chasing a clog that isn’t there.
What You’ll Need
- The filament you normally print with (PLA, PETG, ABS, etc.)
- Nylon or dedicated cleaning filament (the counter-intuitive upgrade — more on that below)
- Needle-nose pliers or tweezers
- A 0.4 mm acupuncture needle or nozzle cleaning needle (optional, for stubborn clogs)
- A wrench or socket that fits your nozzle (usually 6 mm or 7 mm) — only if you end up replacing the nozzle
- Paper towel or cloth for wiping
Cold Pull: Step-by-Step
A cold pull works by heating the filament enough to bond with the debris, then cooling it to a temperature where the plastic is still soft but strong enough to pull the clog out in one piece. The counter-intuitive part: you’ll get a much cleaner pull if you use nylon or cleaning filament instead of the material you were printing with. Nylon has a wide softening range, doesn’t burn easily at higher temperatures, and grabs carbonized residue far better than PLA or PETG. If you have it, use it for the cold pull even if you were printing with something else.
Step 1: Heat to the Right Temperature
- For PLA: Heat the nozzle to 220–230°C (if you were printing PLA at 200°C, go higher to soften any burnt bits).
- For PETG: 240–250°C.
- For ABS: 240–260°C.
- For nylon/cleaning filament: Follow the filament manufacturer’s recommended upper range, typically 250–280°C for nylon.
If you’re using the same filament that caused the clog, set the temperature about 20–30°C above your normal printing temperature. This ensures any hardened residue softens enough to bond with the fresh filament.
Step 2: Feed and Purge
Manually push the filament into the hotend until you see plastic coming out of the nozzle. Extrude 20–30 mm by hand or using the printer’s control menu to flush out loose particles. Wipe the nozzle clean.
Step 3: Cool Down to the “Pull” Temperature
This is the critical window. Turn off the heater or set the temperature to the material’s cold-pull target:
- PLA: 90–100°C
- PETG: 110–120°C
- ABS: 130–140°C
- Nylon/cleaning filament: 120–140°C (check the filament’s glass transition; aim for just above it)
Watch the temperature drop on the display. When it reaches the target, immediately proceed to the next step. If you wait too long, the filament solidifies completely and won’t budge.
Step 4: Pull Firmly and Steadily
Grip the filament with pliers right above the extruder (release the tension arm first) and pull upward with steady, firm pressure. Do not yank violently — a controlled pull gives the debris time to release from the nozzle walls. The filament should come out with a thin, pointy tip that mirrors the inside of the nozzle.
Step 5: Inspect the Pulled Tip
Examine the end of the pulled filament:
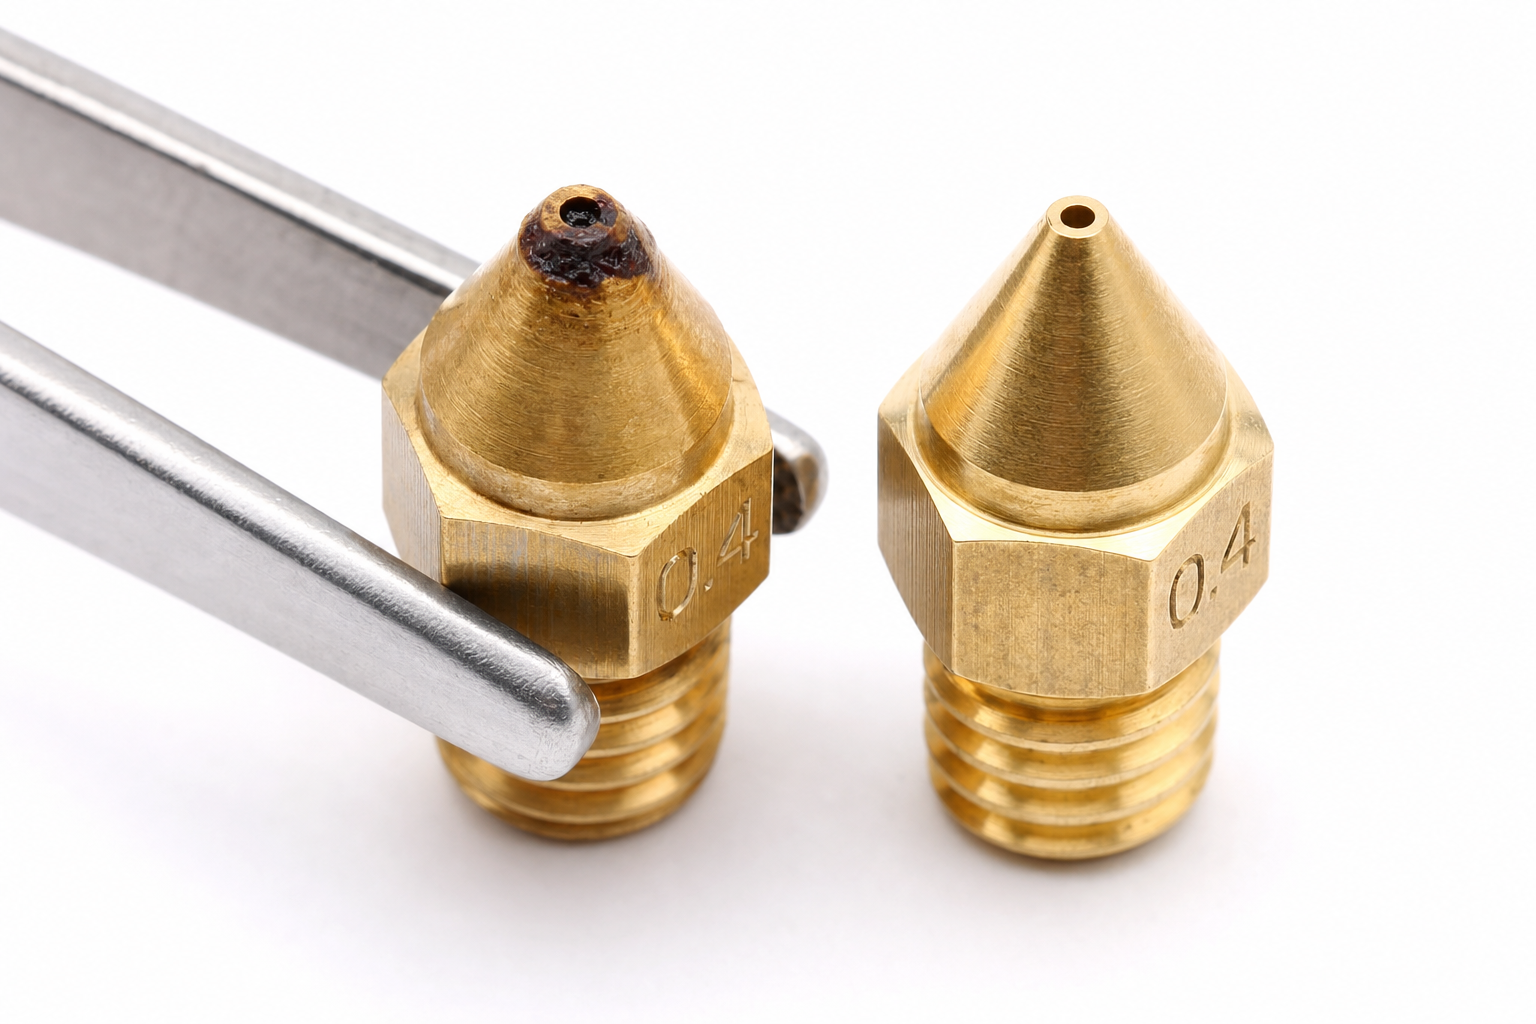
- Success: The tip is a clean cone shape with no black specks or burnt chunks. The nozzle is clear.
- Partial success: You see small black or brown particles embedded in the tip. Repeat the cold pull one or two more times until the tip comes out clean.
- No improvement: The tip is blunt, or the filament broke off inside. Move to alternative methods.
If you used nylon and the tip still shows debris, repeat the pull at the same temperatures — nylon rarely leaves behind residue of its own.
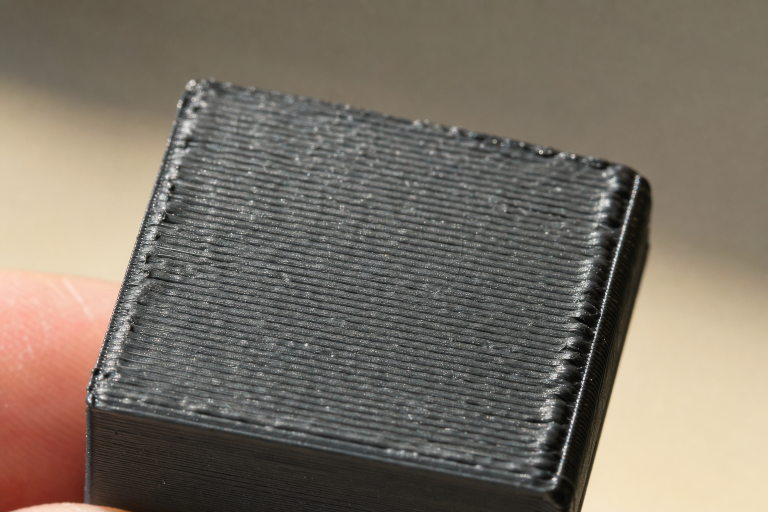
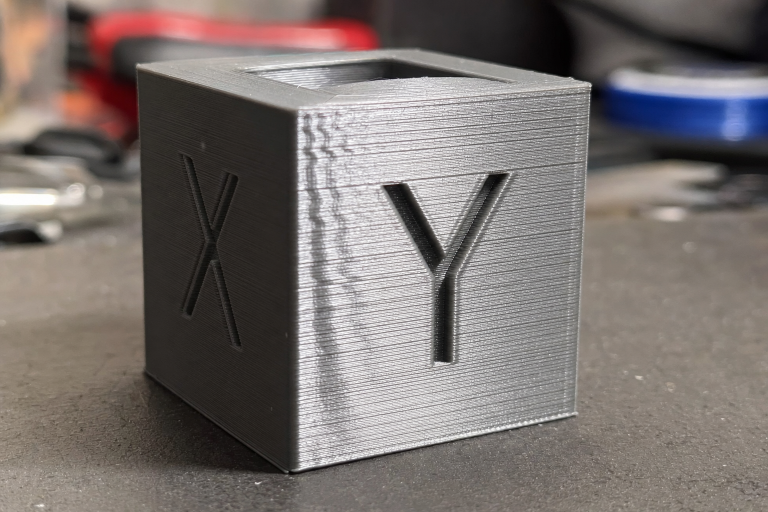
Verification step — confirm the fix worked: After a clean cold pull, load your normal filament, heat to its standard printing temperature, and extrude 50 mm through the printer’s control menu. Watch the extruded strand: it should drop straight down with a consistent thickness and no popping sounds. Then print a small single-wall test cube or a 20 mm calibration cylinder. The walls should be smooth and continuous with no gaps or thin spots. If the test print shows even extrusion across all layers, the clog is fully cleared and you can resume normal printing.
Alternative Methods When a Cold Pull Isn’t Enough
Acupuncture Needle / Nozzle Cleaning Needle
Heat the nozzle to printing temperature, insert a 0.4 mm acupuncture needle from the tip, and gently work it in and out while extruding a small amount of filament. This can break up a stubborn carbonized plug. Be careful not to scratch the nozzle orifice — use a needle that matches your nozzle diameter exactly.
“Hot Tightening” Check
A gap between the nozzle and the heat break can create a pocket where molten filament pools, burns, and causes recurring clogs. Heat the hotend to 280°C (if your thermistor allows), hold the heater block with a wrench, and snug the nozzle against the heat break. Do not overtighten — just enough to close any gap. This is a common hidden cause of clogs that a cold pull alone won’t fix.
Atomic Pull (High-Temperature Variant)
If a standard cold pull fails, try an atomic pull: heat the hotend to the filament’s maximum safe temperature (e.g., 260°C for PLA, though PLA will degrade quickly; better with nylon), push filament through, then immediately cool the hotend by blowing on it or using a fan while pulling firmly. The rapid cooling can trap debris that a slower cool-down misses. This is more aggressive and works best with nylon.
When to Stop and Replace the Nozzle
Stop troubleshooting and replace the nozzle if:
- You’ve done three cold pulls with nylon and still see heavy black residue.
- The nozzle orifice is visibly deformed, scratched, or enlarged (common with abrasive filaments like glow-in-the-dark or carbon-fiber-filled materials).
- You hear a grinding sensation when inserting a cleaning needle — the internal bore may be damaged.
- The printer has thousands of hours on a brass nozzle; wear alone can cause erratic extrusion that mimics a clog.
Nozzles are consumable. A pack of brass 0.4 mm nozzles costs very little and solves the problem permanently when cleaning fails.
Preventing Future Clogs
- Store filament dry: Wet filament doesn’t directly clog a nozzle, but it can cause inconsistent extrusion and stringing that leads people to chase phantom clogs. Use airtight containers with desiccant.
- Use cleaning filament between material switches: Run 50–100 mm of nylon or cleaning filament when changing from a high-temperature material (PETG, ABS) to PLA. It pushes out residue that would otherwise burn and form clogs.
- Calibrate retraction: Excessive retraction distance pulls soft filament into the cold zone, where it solidifies and causes a clog on the next prime. For a direct-drive extruder, stay under 1.5 mm; for Bowden, 4–6 mm is typical. Test with a retraction tower.
- Check hotend cooling fan: A failing hotend fan leads to heat creep — filament softens too early in the heat break and jams. If clogs happen partway through prints and the extruder motor feels hot, heat creep is the likely culprit, not a dirty nozzle.
- Print a temperature tower for each new filament: Running too hot can cook filament inside the nozzle, creating carbon deposits. A temperature tower shows the cleanest extrusion range and helps you avoid the upper limits unnecessarily.
FAQ
Why does my nozzle keep clogging even after a cold pull?
Recurring clogs often point to a mechanical issue, not leftover debris. The most common culprits are a gap between the nozzle and heat break, a degraded PTFE tube inside the hotend (on PTFE-lined hotends), or heat creep from a failing cooling fan. Address those before repeating the cold pull.
Can I use a drill bit or wire to clear a clog?
It’s not recommended. Drill bits can score the internal bore and ruin the nozzle’s surface finish, making future clogs more likely. A proper acupuncture needle or a cold pull is safer and more effective.
Does a cold pull work with flexible filaments?
Cold pulls with TPU are unreliable because the filament stretches instead of pulling the clog out. Switch to a rigid filament like PLA or nylon for the cleaning procedure.
How do I know if the clog is in the nozzle or the heat break?
If a cold pull removes debris from the nozzle tip but extrusion is still restricted, the blockage is likely higher up in the heat break. A full hotend disassembly and cleaning with a heat gun or solvent may be needed. If you’re uncomfortable with that level of teardown, it’s a clear signal to contact the printer manufacturer’s support or replace the hotend assembly.
Explore This Topic
- Back to Extrusion Problems
- Back to 3D Printing Troubleshooting Master Guide
Related guides in this cluster:
- Under-Extrusion: Symptom → Cause → Complete Fix Guide
- How to Fix 3D Print Warping: PLA PETG ABS Complete Guide
- Extruder Clicking & Skipping: Complete Diagnosis Guide
Ryan has been operating FDM 3D printers since 2017. He runs a 12-machine print farm. His daily drivers include a Bambu Lab X1 Carbon, Prusa MK4s, and Creality Ender-3 V3s that have logged over 15000 print hours. He started 3D Printer Nerd to provide structured troubleshooting guides with diagnostic order, material-specific parameters, and clear stop points.