Brim vs Raft vs Skirt: When to Use Each for 3D Printing
Most 3D printing adhesion problems come down to picking the wrong first-layer helper. For the majority of PLA and PETG prints on a modern heated bed, a skirt is all you need, and a brim is your go-to when parts start lifting at the corners. A raft is the nuclear option—effective but wasteful—and you should only reach for it when your bed surface is genuinely uneven, you are printing with warp-prone materials like ABS or nylon, or your part has a tiny contact patch that nothing else can save.
The counter-intuitive truth most generic guides skip: a raft does not fix poor bed leveling. If your nozzle is too far from the bed, a raft prints just as badly as your first layer would. The raft compensates for surface irregularity, not for Z-offset error. Understanding that distinction will save you hours of failed prints and wasted filament.
Best Fit for Each Adhesion Method
Skirt: The Default That Does Not Stick
A skirt is not an adhesion aid at all. It is a priming line that traces the perimeter of your print without touching it. Its only jobs are to purge the nozzle, stabilize extrusion pressure, and let you visually confirm bed leveling before the actual print begins. If you are printing PLA on a clean PEI sheet or textured glass with a properly trammed bed, the skirt is the correct choice. It wastes almost no filament, adds zero post-processing, and leaves no marks on your finished part.
The skirt fits anyone running a calibrated machine with a known-good bed surface. It also fits large, flat-bottomed parts that have plenty of natural adhesion area. If your first layer goes down smooth and you rarely fight warping, you should not be using a brim or raft out of habit. Adding unnecessary adhesion structures slows your print start, wastes material, and creates cleanup work for no benefit.
Brim: The Warp Fighter
A brim is a thin, single-layer extension attached directly to the perimeter of your print. It increases the effective surface area of the first layer, which mechanically resists the peeling forces that cause warping. The brim fits parts with sharp corners, long thin sections, or high aspect ratios—anything prone to curling as upper layers cool and contract. It is the right choice for PETG on smooth surfaces, PLA on slightly tired build plates, and any print where you have seen corners lift mid-job.
Brims also fit multi-part prints where individual pieces have small footprints. A brim ties neighboring parts together into a single larger contact patch, reducing the chance that one component breaks free and ruins the whole plate. The trade-off is minor: you need to trim the brim away with a deburring tool or sharp knife, and it leaves a slight witness line on the bottom edge. For functional parts where bottom-surface cosmetics do not matter, that is a trivial cost for the reliability gain.
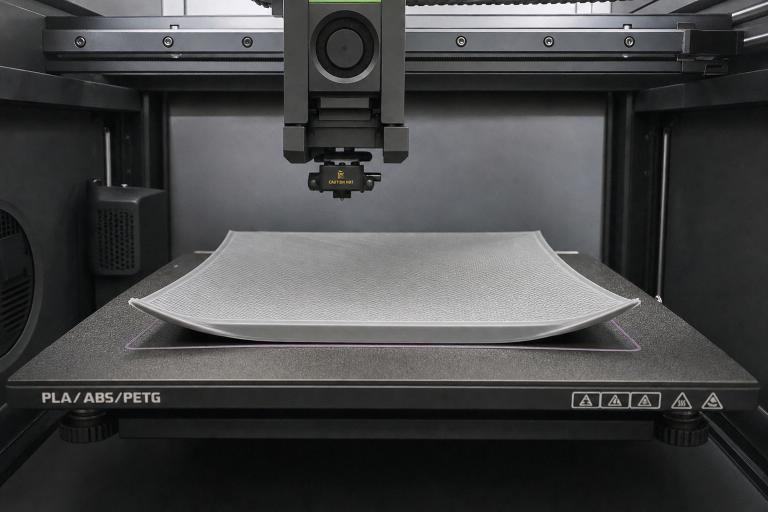
Raft: The Last Resort
A raft is a thick, multi-layer sacrificial platform printed underneath your entire part. The part prints on top of the raft, not directly on the bed. The raft fits exactly three scenarios: your build plate is physically warped or pitted and you cannot replace it immediately, you are printing ABS or nylon without an enclosure and need every adhesion advantage available, or your part has an absurdly small contact area—think a sphere or a pencil-thin vertical tower.
The raft also fits printers with unheated beds or inconsistent bed surfaces, where first-layer adhesion is inherently unreliable. Because the raft itself is printed with thick, slow, high-extrusion lines, it can grip surfaces that would reject a normal first layer. But this comes at a steep cost in filament, time, and bottom-surface finish. The underside of a rafted print is never smooth; it carries the texture of the raft’s top interface layer, which is deliberately under-extruded to allow separation.
Main Trade-Offs
The primary trade-off is material waste versus adhesion reliability. A skirt uses negligible filament—typically less than a gram. A brim on a medium-sized print might consume 2 to 5 grams. A raft on the same print can easily consume 15 to 30 grams, and on large-format printers the waste scales up fast. Over dozens of prints, the filament cost difference between always-using-a-raft and using-a-skirt-by-default is measurable in full spools.
The secondary trade-off is post-processing labor. A skirt peels away instantly with no tooling. A brim requires 30 seconds of trimming and leaves a small seam witness. A raft demands prying, peeling, and sometimes scraping, and it leaves a rough bottom surface that is unacceptable for cosmetic parts. If you are selling prints or building display pieces, raft removal time and surface quality penalties are real costs. For a production environment, the decision often comes down to this: one failed print costs more filament and time than a hundred brims, but a hundred unnecessary rafts cost more labor than a properly leveled bed.
The hidden trade-off is that rafts mask problems you should fix. If you always use a raft because your first layer never sticks, you are compensating for a bed leveling issue, a dirty surface, or an incorrect Z-offset. The raft becomes a crutch that prevents you from diagnosing the root cause. Over time, the underlying problem worsens, and eventually even the raft fails. Brims, by contrast, work with your bed rather than replacing it, so they encourage you to maintain good adhesion fundamentals.
When to Skip Each Method
Skip the skirt when you are printing materials with high warp tendency, such as ABS, ASA, nylon, or unfilled polycarbonate. These materials will lift a skirt along with the part, and you gain nothing from the priming line alone. Also skip the skirt when your part has a footprint smaller than roughly a 20 mm circle; even with perfect bed adhesion, tall slender parts benefit from a brim’s lateral stability.
Skip the brim when your bed adhesion is already excellent and your part has a large, continuous bottom surface. Adding a brim to a 150 mm square base in PLA on clean PEI is pointless—the part is not going anywhere. Skip the brim on parts where the bottom edge is a visible cosmetic surface and you cannot tolerate witness lines. In those cases, improve your bed preparation rather than accepting the brim’s finish penalty.
Skip the raft entirely if your printer has a flat, heated bed and you are printing PLA, PETG, or TPU. These materials do not need a raft on a competent build surface. Skip the raft if you are chasing bottom-surface quality; no amount of interface-layer tuning produces a finish as clean as printing directly on glass or PEI. Skip the raft if you are unwilling to accept the filament waste and time overhead for prints that could succeed with a brim and proper bed preparation. The only defensible raft use is when you have tried a brim, verified your bed leveling and Z-offset, and the part still fails—or when your bed is physically damaged and replacement is days away.
Bottom Line
Use a skirt for 80% of PLA and PETG prints on a well-maintained bed. It primes your nozzle, confirms your leveling, and costs nothing. Switch to a brim the moment you see corner lift, or preemptively for tall, narrow, or sharp-cornered parts. A brim is cheap insurance with minimal downside. Reserve the raft for warp-prone filaments on compromised surfaces, and treat it as a diagnostic signal: if you need a raft for PLA on a heated bed, your printer has a problem that a raft is hiding, not solving.
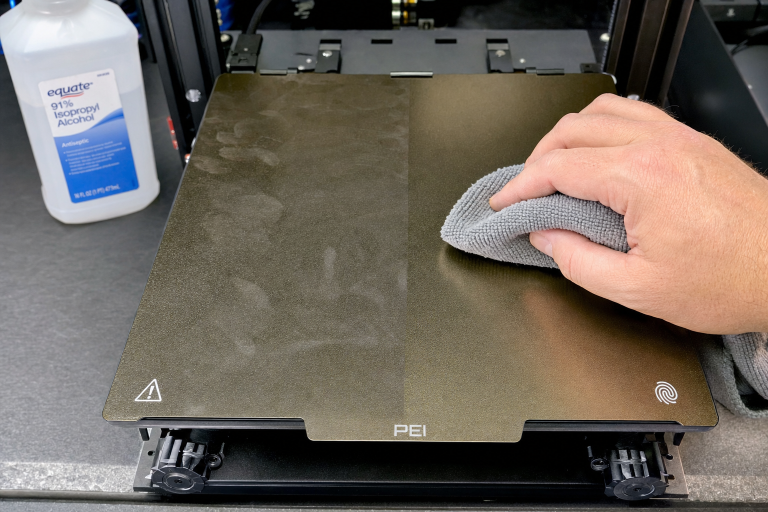
The fastest way to reduce your raft usage is to fix your first layer. Clean your bed with isopropyl alcohol before every print. Verify your Z-offset produces a properly squished extrusion line—not round, not transparent, but flat-topped with slight ridges. Tram your bed until the nozzle distance is consistent across all corners. When those fundamentals are right, the skirt-brim decision becomes straightforward, and the raft becomes what it should be: a rarely used emergency tool, not a default setting.
Explore This Topic
Related guides in this cluster:
- 3D Print Lifting Off Bed at Corners? Complete Fix Guide
- 3D Printer Bed Temperature Guide by Material
- How to Clean a 3D Printer Bed: PEI Glass & Textured
Ryan has been operating FDM 3D printers since 2017. He runs a 12-machine print farm. His daily drivers include a Bambu Lab X1 Carbon, Prusa MK4s, and Creality Ender-3 V3s that have logged over 15000 print hours. He started 3D Printer Nerd to provide structured troubleshooting guides with diagnostic order, material-specific parameters, and clear stop points.