How to Level Your 3D Printer Bed Perfectly
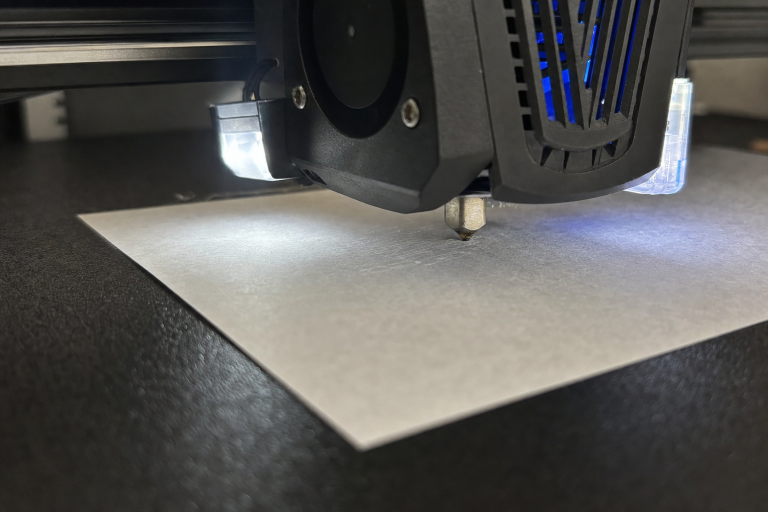
A perfectly level bed means the nozzle maintains the same small gap across every point of the build surface—not that the bed is literally horizontal to the ground. The goal is a consistent first-layer height, typically between 0.1 mm and 0.2 mm depending on your nozzle size and layer height settings, so filament squishes evenly against the build plate without scraping or floating.
Most leveling problems show up as first-layer defects: one corner prints transparent-thin while another barely touches, or filament curls behind the nozzle instead of laying flat. The method below works for manual leveling on the vast majority of consumer FDM printers, including Ender 3 variants, Prusa i3-style machines, and similar open-frame designs. If your printer has automatic bed leveling (BLTouch, CR Touch, inductive probe), you still need a mechanically sound manual baseline—mesh compensation cannot fix a bed that is physically tilted beyond a few tenths of a millimeter.
When Manual Leveling Is the Right Call—and When It Isn’t
Manual leveling with the paper method gives you direct control and costs nothing, but it has real limits. Choose manual leveling if your bed has four corner adjustment knobs and you are willing to recheck level every 5–10 prints or after any nozzle change. The paper method works best on rigid build surfaces like carborundum glass, PEI-coated spring steel, or bare aluminum with painter’s tape.
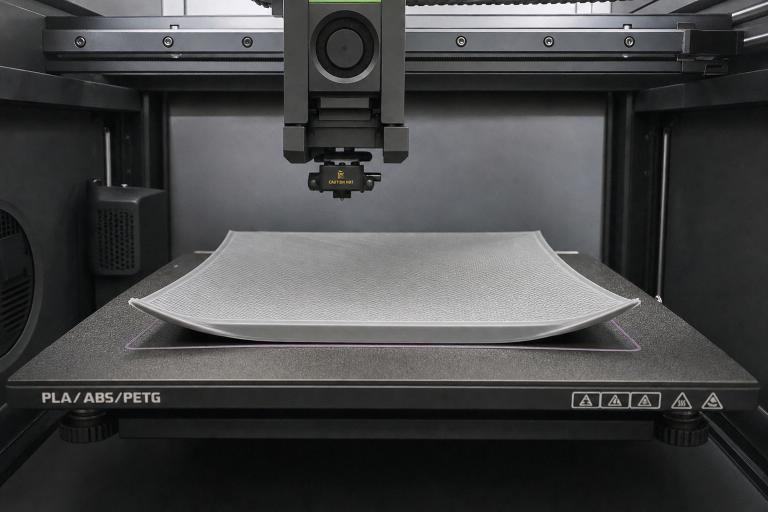
Skip manual-only leveling and install a bed probe if your build plate is warped by more than roughly 0.15 mm from center to edge. A probe with mesh compensation can map a bowl-shaped or crowned bed and adjust the Z height dynamically during printing. You can check for warp with a straightedge and feeler gauge: place the edge diagonally across a cold bed and shine a light behind it. If you see a gap wider than a sheet of printer paper (about 0.1 mm) under the center, mesh leveling will save you hours of frustration.
A third path—manual leveling plus manual mesh—exists in Marlin firmware and gives you probe-free compensation for mild warp. You manually jog the nozzle to grid points and store Z offsets. This is worth enabling if your bed has a consistent low spot but you do not want to add hardware.
What You Need Before You Start
Gather these items before touching any adjustment knob:
- Standard printer paper (roughly 0.1 mm thick). A sticky note works too and is slightly thinner, around 0.08 mm. Avoid glossy or coated paper.
- Isopropyl alcohol (90% or higher) and a lint-free cloth for cleaning the bed.
- The printer’s control interface—either the LCD knob, a connected OctoPrint terminal, or Pronterface.
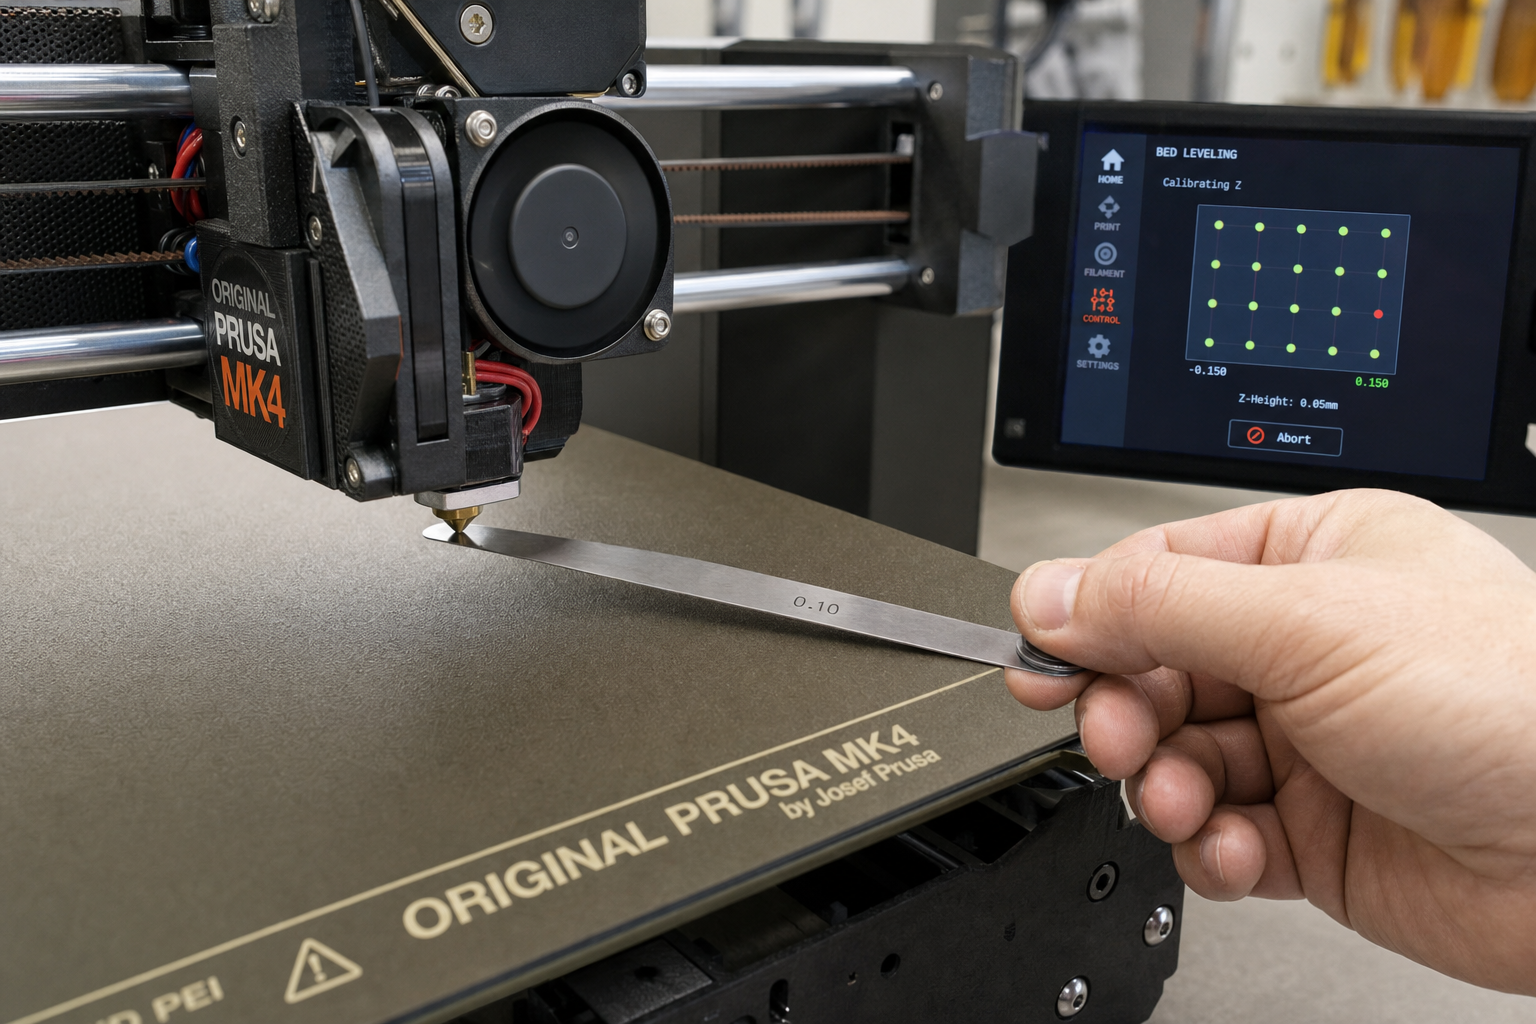
- A 0.1 mm metal feeler gauge (optional but removes paper-compression guesswork).
Heat the bed to your normal printing temperature before leveling. PLA prints on a 50–60 °C bed; PETG typically needs 70–80 °C. Thermal expansion changes the bed shape by 0.05–0.1 mm, so leveling cold and printing hot guarantees an incorrect gap. Heat the nozzle to about 150 °C for PLA or 160 °C for PETG—warm enough to soften any stuck filament on the tip without oozing during the process.
Clean the nozzle tip with a brass brush while warm. A tiny blob of hardened plastic on the tip will throw off every paper-gap check.
Step-by-Step: The Four-Corner Paper Method Done Right
This sequence minimizes the number of times you chase your own adjustments. Each corner change affects the opposite corner slightly, so the order matters.
1. Home the Printer and Disable Steppers
Send `G28` from the terminal or use the LCD “Auto Home” command. The nozzle moves to the endstop-defined zero position. Then disable the stepper motors—`M18` in terminal, or “Disable Steppers” from the LCD menu. This lets you move the X and Y axes by hand without fighting motor holding torque.
Do not skip disabling steppers. Pushing against energized motors risks layer shifting on the next print and makes smooth positioning impossible.
2. Position the Nozzle Over the First Corner
Move the print head by hand until the nozzle sits roughly 20 mm in from both edges of the front-left corner. Slide a sheet of paper under the nozzle.
3. Adjust the Knob Until You Feel Light Drag
Turn the bed-leveling knob for that corner slowly. Pull the paper back and forth while adjusting. Stop when the paper slides with noticeable friction but does not bunch, tear, or lock in place. You want a consistent scraping sensation—not a hard pinch and not free movement.
If you are using a 0.1 mm feeler gauge, stop when the gauge slides under with light resistance and no lifting of the nozzle. A feeler gauge removes the variable of how hard you press the paper.
4. Repeat at All Four Corners in a Diagonal Pattern
Move to the front-left corner, then the back-right, then front-right, then back-left. Go around this diagonal sequence at least twice. The first pass gets you close; the second pass catches the shift caused by the first adjustments. On a bed with four independent screws, a large change at one corner tilts the opposite corner by a fraction of a millimeter.
5. Check the Center
After the second diagonal pass, move the nozzle to the center of the bed. Slide the paper under it. The drag should feel identical to the corners. If the center is tighter, your bed is slightly bowed upward (convex). If the center is looser, the bed is dished (concave). A difference of one paper-sheet thickness or less is acceptable for most prints. More than that means you should consider mesh compensation.
6. Run a Live Leveling Print
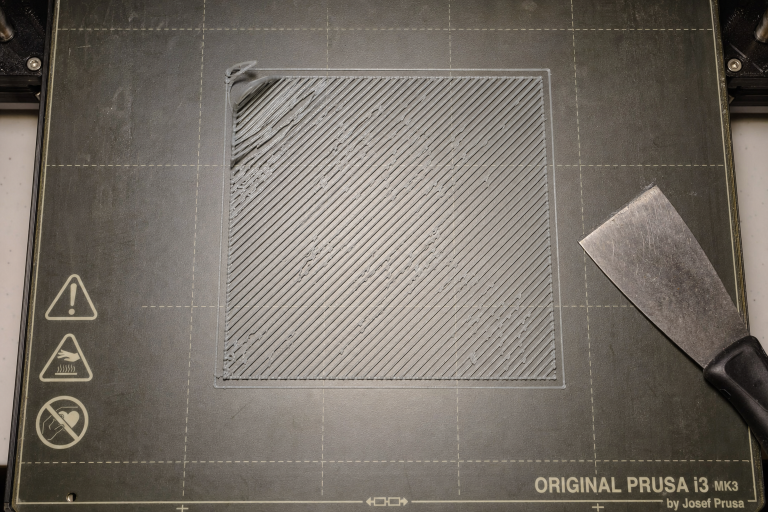
Slice a single-layer 75 mm × 75 mm square, or use the five-point leveling test built into many printer SD cards. Watch the extruded lines as they go down:
- Lines with gaps between them: nozzle too high. Lower the bed at that corner by an eighth of a turn.
- Lines that are translucent, ridged, or have raised edges: nozzle too low. Raise the bed slightly.
- Lines that are flat, touching edge-to-edge, and uniform in color: correct height.
Adjust knobs in tiny increments—no more than a quarter turn at a time—while the test print runs. This live-tuning step catches errors the paper method misses, especially on textured PEI sheets where paper drag feels different from smooth glass.
Common Failure Points and What They Look Like
Leveling fails in predictable ways. Recognizing the pattern saves you from re-leveling a bed that has a different problem entirely.
Warped bed masquerading as leveling error. If you level corners perfectly but the center is always too tight or too loose, the bed is warped. No amount of knob-turning fixes a physical curve. Measure with a straightedge and decide between manual mesh, a bed probe, or replacing the build plate with a flatter surface like cast aluminum tooling plate or float glass.
Loose eccentric nuts on the Y-axis or bed carriage. Grab the bed at the front edge and try to rock it side-to-side. Any play means the V-roller eccentric nuts under the bed need tightening. A wobbly bed changes height as it moves, making leveling impossible to hold across a print. On an Ender 3, for example, a single loose eccentric nut on the Y-axis carriage can cause the bed to tilt by 0.2 mm or more as it travels forward and backward.
Z-axis binding or inconsistent homing. If your first layer height changes between prints even without touching the knobs, the Z-axis may be binding. Check that the Z leadscrew turns freely and that the gantry does not sag on the side opposite the leadscrew. On single-Z-screw printers like the Ender 3, the right side of the gantry can droop by 0.5 mm or more. Re-tighten the gantry eccentric nuts and re-level.
Dirty or greasy build surface. Fingerprints transfer skin oil that kills adhesion even on a perfectly leveled bed. Wipe the bed with 90% isopropyl alcohol before every print. For PEI sheets, a quick scuff with 0000 steel wool followed by an alcohol wipe restores adhesion on older surfaces. If you have touched the bed with bare hands since the last cleaning, assume it is contaminated.
Wrong Z-offset after leveling. If your printer uses a Z endstop switch, the Z-offset is baked into the endstop position and your manual level. If you have a bed probe, the Z-offset is a separate stored value that tells the firmware how far the probe tip is from the nozzle tip. After manual leveling with a probe installed, always recheck and adjust the probe Z-offset using a live first-layer test. A perfectly leveled bed with an incorrect Z-offset still produces a failed first layer.
How to Verify the Level Is Actually Perfect
A successful level passes three checks:
1. Paper test consistency. Same drag at all four corners and center after two full diagonal passes.
2. First-layer test print. A single-layer square prints with no gaps, no ridges, and no thin translucent spots. Lines merge side-by-side into a smooth surface you cannot separate by pulling.
3. Repeatability. Print the same first-layer test again without re-leveling. The result should be identical. If it shifts, look for mechanical issues—loose knobs, wobbling bed, or Z-axis inconsistency.
For a more precise verification, print a 0.2 mm tall single-layer square and measure it with calipers at multiple points. A deviation of ±0.02 mm across the part indicates an excellent level. ±0.05 mm is acceptable for functional prints. Anything beyond ±0.1 mm needs correction.
When to Stop Self-Troubleshooting and Escalate
Stop adjusting and check the hardware if you have leveled three times in a row and the first layer still fails in the same spot. Persistent failure in one area points to a warped bed, a bent Y-axis extrusion, or a damaged build surface—not a leveling technique problem.
Stop and replace the build surface if you see deep gouges, peeling coating, or bubbles under a magnetic sheet. No amount of leveling compensates for a physically damaged surface. A gouge deeper than roughly 0.1 mm will reliably show up as a first-layer void on every print that crosses it.
Stop and consult your printer’s assembly guide if the bed knobs are fully compressed or fully extended with no adjustment range left. You may need to move the Z endstop switch slightly higher or lower to restore usable knob travel. If the Z endstop is fixed and cannot be adjusted, check whether your firmware supports a Z-offset override via the LCD menu or terminal commands like `M851` and `M500`.
Stop and contact the manufacturer or a qualified repair technician if you notice any of the following: a bent leadscrew that causes visible Z-axis wobble during travel, a cracked bed carriage plate, or a mainboard that fails to respond consistently to Z-axis movement commands. These are hardware faults that no amount of leveling technique can overcome, and continuing to print risks damaging other components.
Frequently Asked Questions
How often should I level my 3D printer bed?
Re-level after every nozzle change, after removing and reinstalling the build plate, or when you notice first-layer adhesion problems. On printers with stiff bed springs or silicone spacers, leveling can hold for 10–20 prints. Printers with weak stock springs may need leveling every 3–5 prints; upgrading to yellow die springs or silicone columns extends the interval significantly.
Can I level the bed while it is cold?
You can, but you should not. A bed heated to 60 °C expands enough to change the nozzle gap by roughly 0.05 mm, which is half the thickness of a typical first layer. Always level at your actual printing temperature for the material you use most often.
Does a BLTouch or CR Touch eliminate manual leveling?
No. A bed probe compensates for small height variations across the surface, but the bed must still be mechanically level within a reasonable range—typically within 0.3 mm corner-to-corner. If the bed is grossly tilted, the probe’s mesh compensation works harder than necessary and can introduce Z-axis artifacts during printing.
What if my printer only has three leveling points?
Three-point leveling defines a plane without the over-constraint issues of four-point systems. The process is the same, but you only adjust three points in a triangle pattern. Three-point beds are less likely to warp from knob pressure, but they are also less common on budget printers.
My paper test feels perfect, but prints still do not stick. What else should I check?
Clean the bed with isopropyl alcohol, verify your bed temperature with an infrared thermometer (some beds read 5–10 °C cooler than reported), and check that your first-layer print speed is set to 20–25 mm/s in the slicer. Printing the first layer too fast prevents proper adhesion even on a perfectly leveled bed.
Explore This Topic
- Back to Bed Leveling & Z-Offset
- Back to 3D Printing First Layer & Bed Adhesion Guide
Related guides in this cluster:
- 3D Printer Bed Temperature Guide by Material
- How to Clean a 3D Printer Bed: PEI Glass & Textured
- Z-Offset: What It Is & How to Calibrate Perfectly
Ryan has been operating FDM 3D printers since 2017. He runs a 12-machine print farm. His daily drivers include a Bambu Lab X1 Carbon, Prusa MK4s, and Creality Ender-3 V3s that have logged over 15000 print hours. He started 3D Printer Nerd to provide structured troubleshooting guides with diagnostic order, material-specific parameters, and clear stop points.