Z-Offset: What It Is & How to Calibrate Perfectly
If your first layer won’t stick, peels up mid-print, or looks like a frayed rope instead of a smooth ribbon, your Z-offset is almost certainly wrong. Z-offset is the vertical distance between the nozzle tip and the print surface at Z=0, and a calibration error of just 0.05 mm can turn a reliable printer into a frustration machine. Here’s the counterintuitive part most generic guides skip: the perfect Z-offset isn’t a single number you set once. It drifts with bed temperature, surface wear, and even ambient humidity, so treating it as a fixed value rather than a per-print verification habit is the root cause of most recurring first-layer failures.
What You Need Before Starting
Gather these items before you touch any settings. Skipping preparation is the fastest way to chase a phantom offset problem that’s actually a dirty bed or a cold machine.
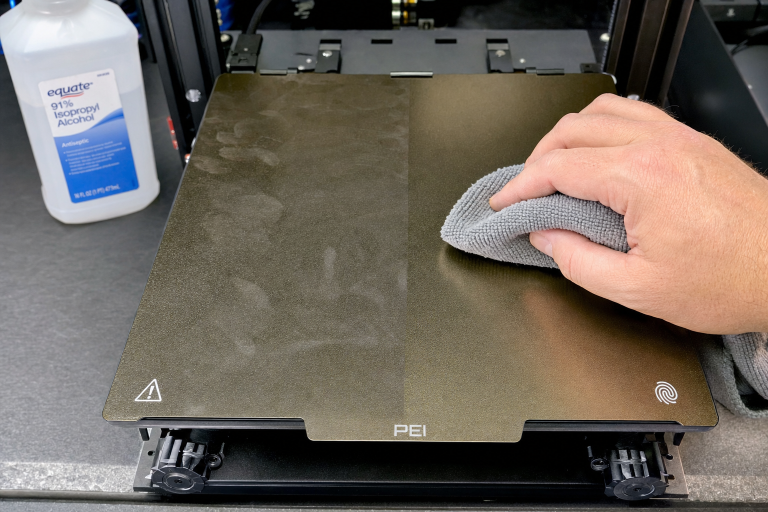
- Isopropyl alcohol (90% or higher) and a lint-free cloth. Lower concentrations leave residue that mimics adhesion failure.
- Standard printer paper (roughly 0.10 mm thick). This is your coarse baseline tool, not the final calibration.
- A sliced first-layer test print. A single-layer 40×40 mm square or a 5-point patch pattern works. Slice it at your normal print temperature and 0.20 mm layer height.
- The printer’s control interface (LCD menu, OctoPrint, or Klipper web UI) with live Z-offset adjustment accessible. On Marlin, this lives under “Tune” > “Babystep Z.” On Klipper, it’s the Z-offset control in the dashboard.
Heat the bed to your intended print temperature and let it soak for five full minutes. Thermal expansion shifts the bed position by 0.05–0.10 mm, enough to invalidate a cold calibration. Wipe the build surface with IPA while the bed is warm—this lifts oils that cold cleaning misses.
Diagnose the Adhesion Failure First
You don’t need to wait for a spaghetti mess. The first 30 seconds of extrusion tell you everything.
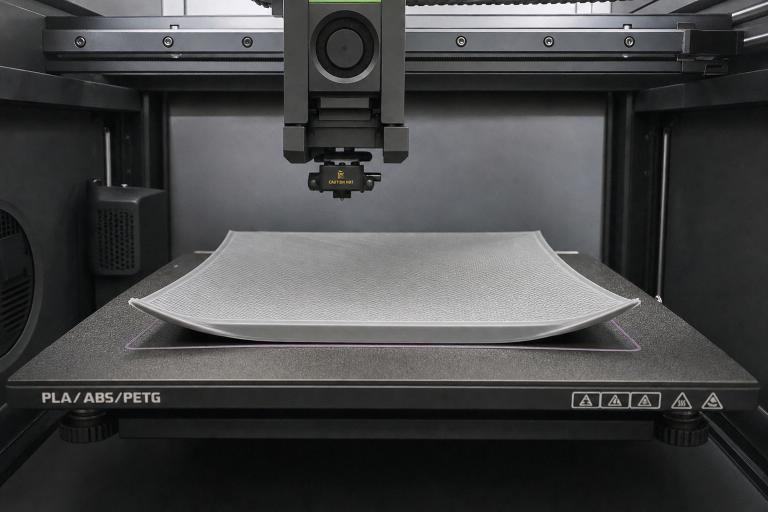
Nozzle too high (offset too positive): The extruded filament lands as a round bead that sits on top of the bed rather than pressing into it. You’ll see gaps between adjacent lines, and the filament lifts off with a fingernail. On PEI, a too-high first layer looks shiny and cylindrical rather than flat and matte.
Nozzle too low (offset too negative): The extruder clicks or skips because the nozzle is blocked by the bed. The first layer appears translucent, razor-thin, or rippled with ridges where excess plastic squeezes up between nozzle passes. In extreme cases, the nozzle gouges the build surface, permanently damaging PEI or glass.
The peel test for confirmation: Print your single-layer square, peel it off, and hold it up to a light. A correct first layer shows no gaps between lines, feels smooth on top with minimal ridging, and doesn’t separate into individual strands when you flex it. If it pulls apart like string cheese, you’re too high. If it’s rough like sandpaper or you can see through it, you’re too low.
Calibrate Z-Offset: Ordered Steps
1. Home and Set a Paper Baseline
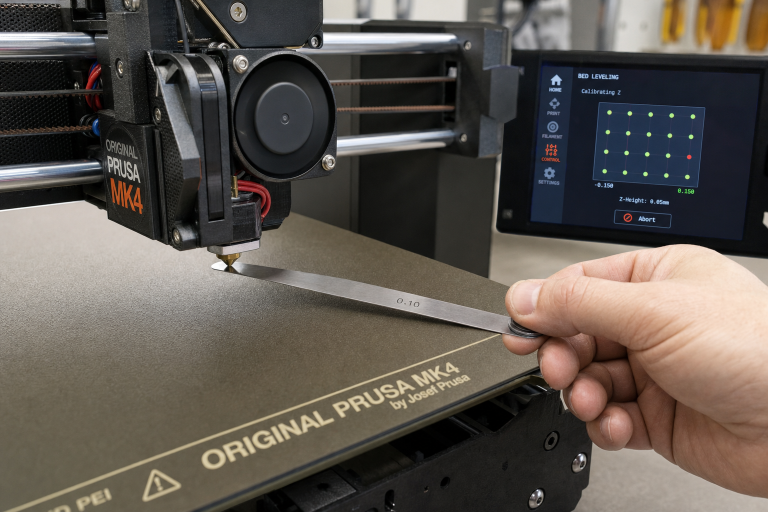
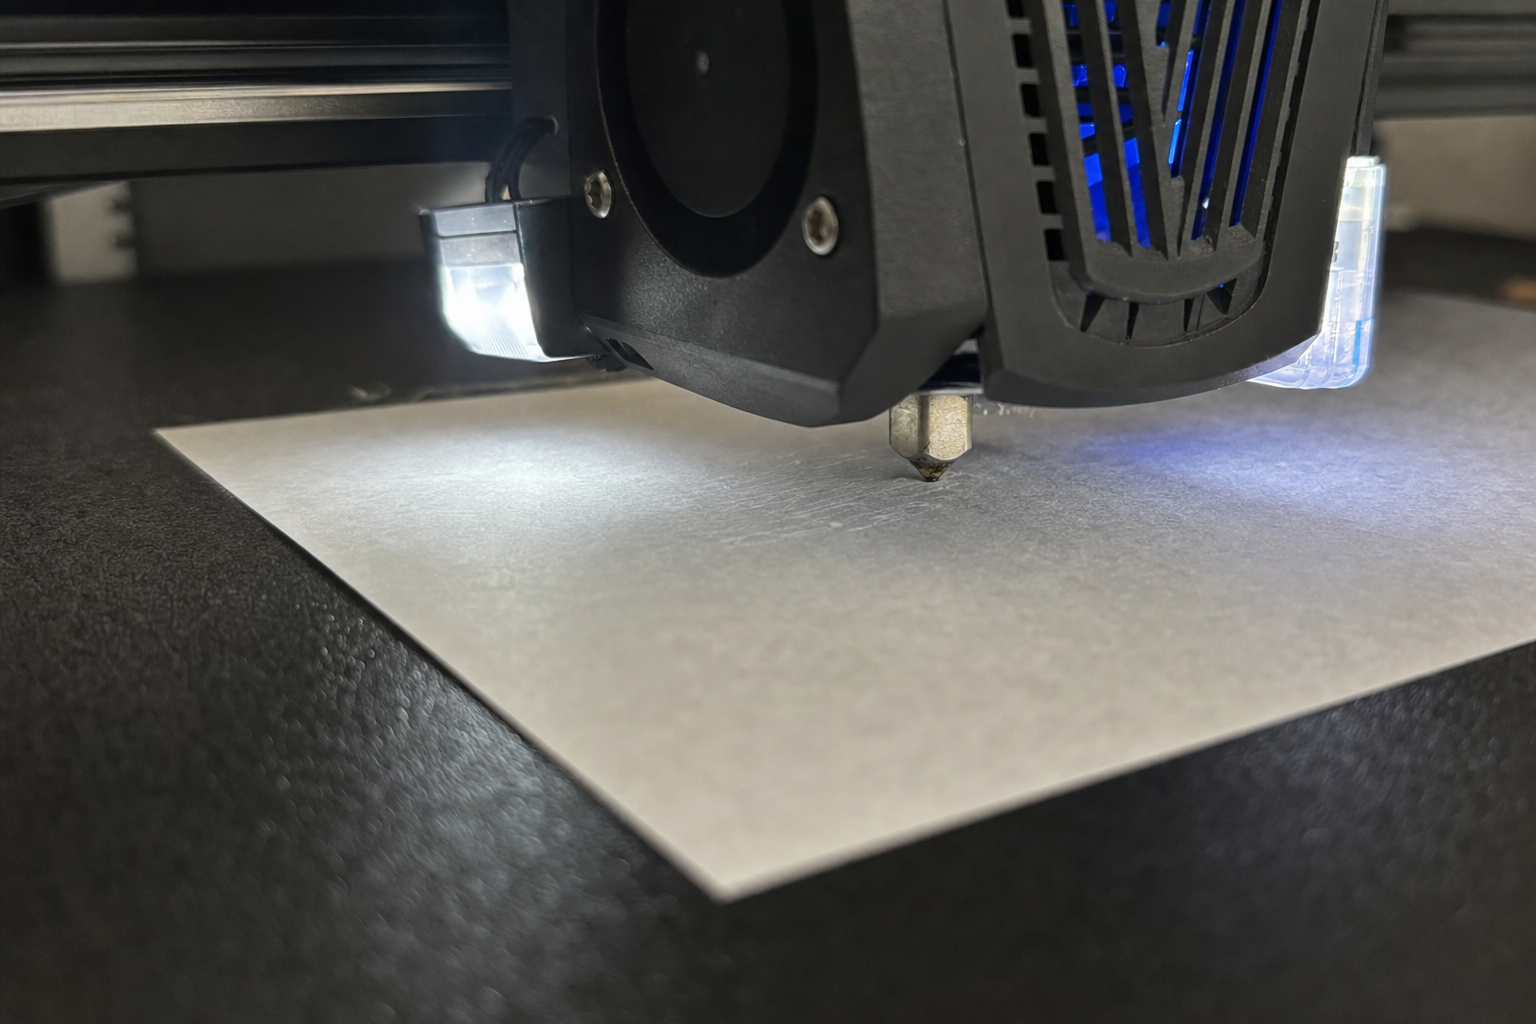
Home all axes, then command the printer to move to Z=0. Slide the printer paper under the nozzle. You should feel light drag—resistance when pulling but not enough to tear the paper. This is your starting point, not the finished calibration. Paper thickness varies, and feel is subjective, so you’ll refine from here.
2. Print the Live Calibration Pattern
Start your first-layer test print. Watch the first lines go down and adjust Z-offset in 0.02 mm increments while the skirt or brim prints. Negative values move the nozzle closer to the bed. If lines aren’t sticking, decrease Z-offset by -0.04 mm and observe. If the nozzle is scraping, increase by +0.02 mm until the extruder stops skipping.
3. Inspect Each Test Patch
A 5-point pattern exposes bed-leveling issues that a single center square hides. Check each patch individually. If the center looks perfect but one corner shows gaps, your bed mesh or manual leveling needs attention—Z-offset alone cannot compensate for a tilted bed.
4. Lock In the Correct Value
Once the test patch looks right—evenly flat, no gaps, no ridges—note the offset value. On Marlin firmware, store it with “Store Settings” or the M500 command. On Klipper, update the `positionendstop` or `zoffset` in your `[probe]` or `[stepperz]` section and issue `SAVECONFIG`. If your slicer uses a Z-offset plugin, transfer the value there as well, but be aware that slicer offsets stack with firmware offsets. A firmware offset of -1.50 mm plus a slicer offset of -0.10 mm totals -1.60 mm, which can crash the nozzle. Use one method consistently and zero out the other.
Surface-Specific Offset Indicators
Different build surfaces demand different Z-offset strategies. The table below summarizes what to look for.
| Surface | Correct Offset Indicator | Too High Indicator | Too Low Indicator | Cleaning Protocol |
|---|---|---|---|---|
| Textured PEI | Matte finish, texture valleys filled but peaks visible | Shiny, round beads; gaps between lines | Glossy bottom surface; flattened texture peaks | 90%+ IPA wipe; avoid acetone on coated PEI |
| Smooth PEI | Uniform matte finish, no shiny patches | Shiny patches; lines lift with fingernail | Permanent ghosting marks; translucent layer | 90%+ IPA; occasional soap and water wash |
| Glass | Even, slightly glossy first layer with no gaps | Filament doesn’t stick at all; beads roll | Nozzle scrapes; extruder skips | Soap and water wash, then IPA; avoid touching surface |
| Garolite (G10) | Slightly textured bottom, strong adhesion without tearing | Poor adhesion; filament lifts easily | Deep nozzle marks; excessive material squeeze | IPA wipe; light sanding with 600-grit if adhesion drops |
Textured PEI: The texture hides minor offset errors, which sounds helpful until you realize you’re printing too low and slowly abrading the coating. If the bottom surface of your print is glossy rather than matte, you’re too close.
Smooth PEI: Unforgiving and precise. Too high leaves shiny patches; too low creates permanent ghosting marks that transfer to every subsequent print.
Glass: Even with perfect Z-offset, PLA won’t stick to fingerprint-contaminated glass. After IPA, wash with warm water and plain dish soap, dry with a clean paper towel, and avoid touching the surface.
Garolite (G10): Popular for nylon and PETG, garolite requires a slightly more negative offset than PEI because the material needs mechanical keying into the surface texture. Start at paper-thickness drag and decrease by an additional -0.04 mm.
When Z-Offset Isn’t the Real Problem
Before you chase the offset into oblivion, rule out these imposters that mimic Z-offset failures.
- Warped bed: If the center sticks perfectly but corners lift, your bed mesh is compensating for a physical warp. Z-offset can’t fix a 0.3 mm dip. Verify that a bed mesh probe (BLTouch, CR Touch, inductive sensor) is working and that a valid mesh is loaded at print start (M420 S1 in Marlin, `BEDMESHPROFILE LOAD=` in Klipper).
- Loose gantry or X-axis sag: On a single-Z-screw printer, the right side of the gantry can droop by 0.2–0.5 mm, producing perfect adhesion on the left and failure on the right. Tighten the eccentric nuts and consider a dual-Z upgrade before adjusting offset.
- Partial nozzle clog: A partially obstructed nozzle extrudes inconsistently, creating thin spots that look like offset errors. If you see periodic under-extrusion in a repeating pattern, do a cold pull before touching the offset.
- Wet filament: PLA that pops and hisses during extrusion creates micro-gaps in the first layer that mimic a too-high offset. Dry your filament at 45–50°C for 4–6 hours before concluding the offset is wrong.
Brim vs. Raft: When Adhesion Aids Make Sense
A correct Z-offset should make most PLA and PETG prints stick without helpers. If you’re reaching for glue stick or a brim on a simple 50 mm cube, your offset or bed prep is still off.
| Aid | When to Use | When to Skip |
|---|---|---|
| Brim | Sharp corners prone to warping (ABS, ASA, nylon); small contact area relative to part height | PLA on clean PEI; parts with large flat bases |
| Raft | Damaged bed surface; irregular bottom geometry; aggressive shrinkers (polycarbonate, pure nylon) | Any situation where bottom surface finish matters; simple geometries |
| None | PLA on clean PEI; PETG on textured PEI with correct offset; TPU on unheated garolite | When adhesion fails after verifying Z-offset and cleanliness |
A 5–8 mm brim with 0.0 mm separation distance adds grip without ruining the bottom edge. Rafts waste filament and leave a rough bottom finish, so they’re a last resort, not a default. Glue stick on PEI for PLA is a bandage for bad Z-offset or a dirty bed—fix the root cause first.
Ambient Conditions That Sabotage Calibration
A draft across the print bed cools the first layer unevenly, causing edge lifting that looks like an offset problem. If your printer sits near a window, door, or HVAC vent, ambient temperature swings of even 5°C can cause corner warping on large PLA parts. Enclose the printer or add a draft shield in your slicer (a single-perimeter wall around the print) before adjusting offset downward to compensate.
When to Stop and Escalate
Stop self-troubleshooting and check the manual or contact support if any of these concrete thresholds are met:
- You’ve adjusted Z-offset across a range of ±0.20 mm with no visible change in first-layer quality. A functional system responds to 0.02 mm increments; zero response indicates a mechanical or firmware fault.
- The nozzle visibly gouges the bed at any offset value, indicating a bent Z-rod, loose coupler, or failed endstop switch.
- One corner of the bed refuses to level despite multiple mesh probes, suggesting a warped carriage plate or failed bed heater causing uneven thermal expansion.
- The extruder motor skips steps at every offset value, pointing to a clogged hotend, incorrect E-steps, or a faulty stepper driver.
Frequently Asked Questions
How often should I recheck Z-offset?
Recheck Z-offset whenever you change the nozzle, switch build surfaces, or notice first-layer quality degrading over several prints. For a printer in daily use, verifying with a quick single-layer test patch once a week catches drift before it ruins a long print.
Does Z-offset change with different filament materials?
Yes, because bed temperatures differ and thermal expansion shifts the nozzle-to-bed gap. PETG typically needs a slightly more positive offset than PLA (0.02–0.04 mm higher) to prevent over-adhesion that can tear PEI surfaces. Always recalibrate when switching between materials with more than a 20°C bed temperature difference.
Can I set Z-offset in the slicer instead of firmware?
You can, but be careful. Slicer Z-offset settings stack on top of firmware offsets. If your firmware stores -1.50 mm and your slicer adds another -0.10 mm, the total becomes -1.60 mm, which can crash the nozzle. Use one method consistently and zero out the other.
Why does my Z-offset keep changing between prints?
A drifting Z-offset usually points to a mechanical issue: loose grub screws on the Z coupler, a slipping Z-axis leadscrew nut, or a probe mount that shifts with temperature. Tighten all Z-axis fasteners and verify that the probe is rigidly mounted before assuming the offset value itself is unstable.
Explore This Topic
- Back to Bed Leveling & Z-Offset
- Back to 3D Printing First Layer & Bed Adhesion Guide
Related guides in this cluster:
Ryan has been operating FDM 3D printers since 2017. He runs a 12-machine print farm. His daily drivers include a Bambu Lab X1 Carbon, Prusa MK4s, and Creality Ender-3 V3s that have logged over 15000 print hours. He started 3D Printer Nerd to provide structured troubleshooting guides with diagnostic order, material-specific parameters, and clear stop points.