Best Budget Resin 3D Printer: Creality HALOT R6 and the Competition
The Creality HALOT R6 is the best budget resin 3D printer for most hobbyists right now—it delivers sharp 6K resolution on a solid build platform for around $110. But that $110 is only the beginning. The cheapest printer you buy today can cost you more in the first year than a slightly pricier model, thanks to LCD screen failures that run $35–$60 to replace and proprietary resin cartridges that some brands lock you into at $50–$80 per kilogram. Here’s how to pick the right one without getting burned.
budget resin 3d printer” />: Top Picks & Guide
Quick answer
Buy the Creality HALOT R6 if you want reliable entry-level performance with good print detail and a build volume large enough for miniatures, jewelry patterns, and small prototypes. Its 6K monochrome LCD gives you faster layer curing (2–4 second exposures per layer) compared to older 2K or 4K screens, and the open resin system means you can run standard 405nm resin from any reputable brand—no proprietary cartridges to inflate your material costs.
If you absolutely cannot stretch past $100, the Anycubic Photon Mono 2 is a solid fallback with a 4K screen and proven build quality, though you’ll give up some detail and build volume for that lower price.
What this means for your next move: If you plan to print more than 10–15 models per month, invest the extra $20–$30 for a printer with a larger build volume and an open resin system. The savings on resin alone will cover the difference within 3–4 months. Skip any machine that requires proprietary resin cartridges—the ongoing cost will wipe out any upfront savings by month six.
What actually matters in a budget resin printer
Most entry-level resin printers share similar components—a 405nm monochrome LCD, a Z-axis lead screw, and a metal vat. The real differences that affect your prints and wallet come down to four things:
Screen resolution and build volume
- 6K screens (3840×2400) at this price point give you finer XY detail. You’ll notice the difference on 28mm miniatures and small text.
- 4K screens (3840×2160) still produce good prints, but the pixel grid is more visible on small parts.
- Build volume matters if you want to print multiple parts in one batch. The HALOT R6 offers 172×102×160mm (6.7×4×6.3 inches), which fits a dozen 28mm figures or several small components per run.
LCD lifespan and replacement cost
This is the hidden cost most guides skip. Budget resin printers use monochrome LCDs rated for 2,000–3,000 hours, but the actual lifespan depends on how well you protect the screen from resin leaks and how aggressively you cure layers. A replacement LCD runs $30–$60 and is a wear item, not a one-time purchase. Some brands keep replacement screens in stock for years; others drop support after 12 months. Check availability before you buy.
Resin system (open vs. closed)
- Open system – You can use any 405nm resin. This keeps material costs at $20–$40 per kilogram and lets you switch between standard, tough, flexible, or castable resins without markup.
- Closed/cartridge system – The printer only accepts the manufacturer’s resin (often $50–$80/kg). Avoid these for budget builds unless you have a specific medical or compliance reason to use them.
Slicer support and user community
The HALOT R6 works with Halot Box (free included slicer), Chitubox, and Lychee Slicer. A printer that forces you into a clunky proprietary slicer with fewer community profiles will waste your time dialing in settings. Stick with machines supported by at least one of the big two slicers (Chitubox, Lychee).
How to verify this before buying: Go to the Chitubox or Lychee website and search for the printer model in their supported machine list. If it’s not there, check the manufacturer’s own slicer for community profile sharing features. No profiles means you’ll be guessing exposure times from scratch.
Best-fit picks by use case
For tabletop miniatures and detail work: Creality HALOT R6 (~$110)
- Resolution: 6K (3840×2400)
- Layer height range: 0.01–0.05mm
- Build volume: 172×102×160mm
- LCD life: ~2,000 hours (replace at first sign of dark bands or uneven curing)
- Slicer: Halot Box, Chitubox, Lychee
The 6K screen resolves fine facial features and weapon details at 0.03mm layer height. The ball-and-socket build plate is easier to level than the four-screw systems on older Photon or Mars models—you just tighten one knob and adjust the Z-offset in the menu. Print time for a single 28mm figure at 0.03mm is about 2.5–3.5 hours depending on resin.
Common failure point: The USB port is flimsy. Budget another $10 for a wireless file transfer dongle or use a good-quality USB 2.0 drive (≤16GB) formatted to FAT32.
For small functional parts and jewelry: Anycubic Photon Mono 2 (~$150)
- Resolution: 4K (3840×2160)
- Layer height range: 0.01–0.05mm
- Build volume: 165×89×143mm (slightly smaller than HALOT R6)
- LCD life: ~2,000 hours
- Slicer: Anycubic Photon Workshop, Chitubox, Lychee
The Photon Mono 2 is a safe, well-documented machine with years of community support. The 4K screen is adequate for castable jewelry patterns to 0.02mm, and replacement LCDs are widely available for about $35. Its Z-axis is stiffer than the HALOT R6’s, which helps with dimensional accuracy on taller parts.
Trade-off: The build plate uses four adjusting screws. Leveling takes longer and is less repeatable than the HALOT R6’s single-knob system. Expect to re-level every 5–10 prints.
For the absolute tightest budget: Elegoo Mars 4 (~$130)
- Resolution: 6K (3840×2400)
- Layer height range: 0.01–0.05mm
- Build volume: 153×77×165mm (narrow XY, good for tall thin parts)
- LCD life: ~2,500 hours
- Slicer: Chitubox, Lychee
The Mars 4 gives you a 6K screen for about the same price as the HALOT R6, but the build volume sacrifices XY width. It’s great for tall single models like action figures or sword prototypes, but you can’t pack as many parts across the plate. Elegoo’s community is huge, so troubleshooting is easier, and replacement parts stay available longer.
Cooling note: The Mars 4 runs the fan at full speed during operation. It’s loud enough to be annoying in a small room—place it in a garage or well-ventilated utility space.
Trade-offs to know
The $100 printer trap
At $99–$119, the HALOT R6 is genuinely cheap, but the total cost of ownership for 12 months of regular use (30 prints per month) includes:
- Resin: 1 kg of standard 405nm resin every 2 months = $120–$240/year
- LCD replacement: 1 screen per year = $35–$60
- FEP/nFEP film: 2–3 replacements per year = $10–$15/year
- IPA for cleaning: ~$20–$30/year
- Curing station or sunlight: $0–$50 (one-time)
That puts the real first-year cost at $285–$395 for a $110 printer. A printer with a longer LCD life (Elegoo Mars 4’s 2,500-hour rating) or a cheaper replacement screen (Photon Mono 2 at $35) can save you money by the second year.
Print failure costs more on cheap printers
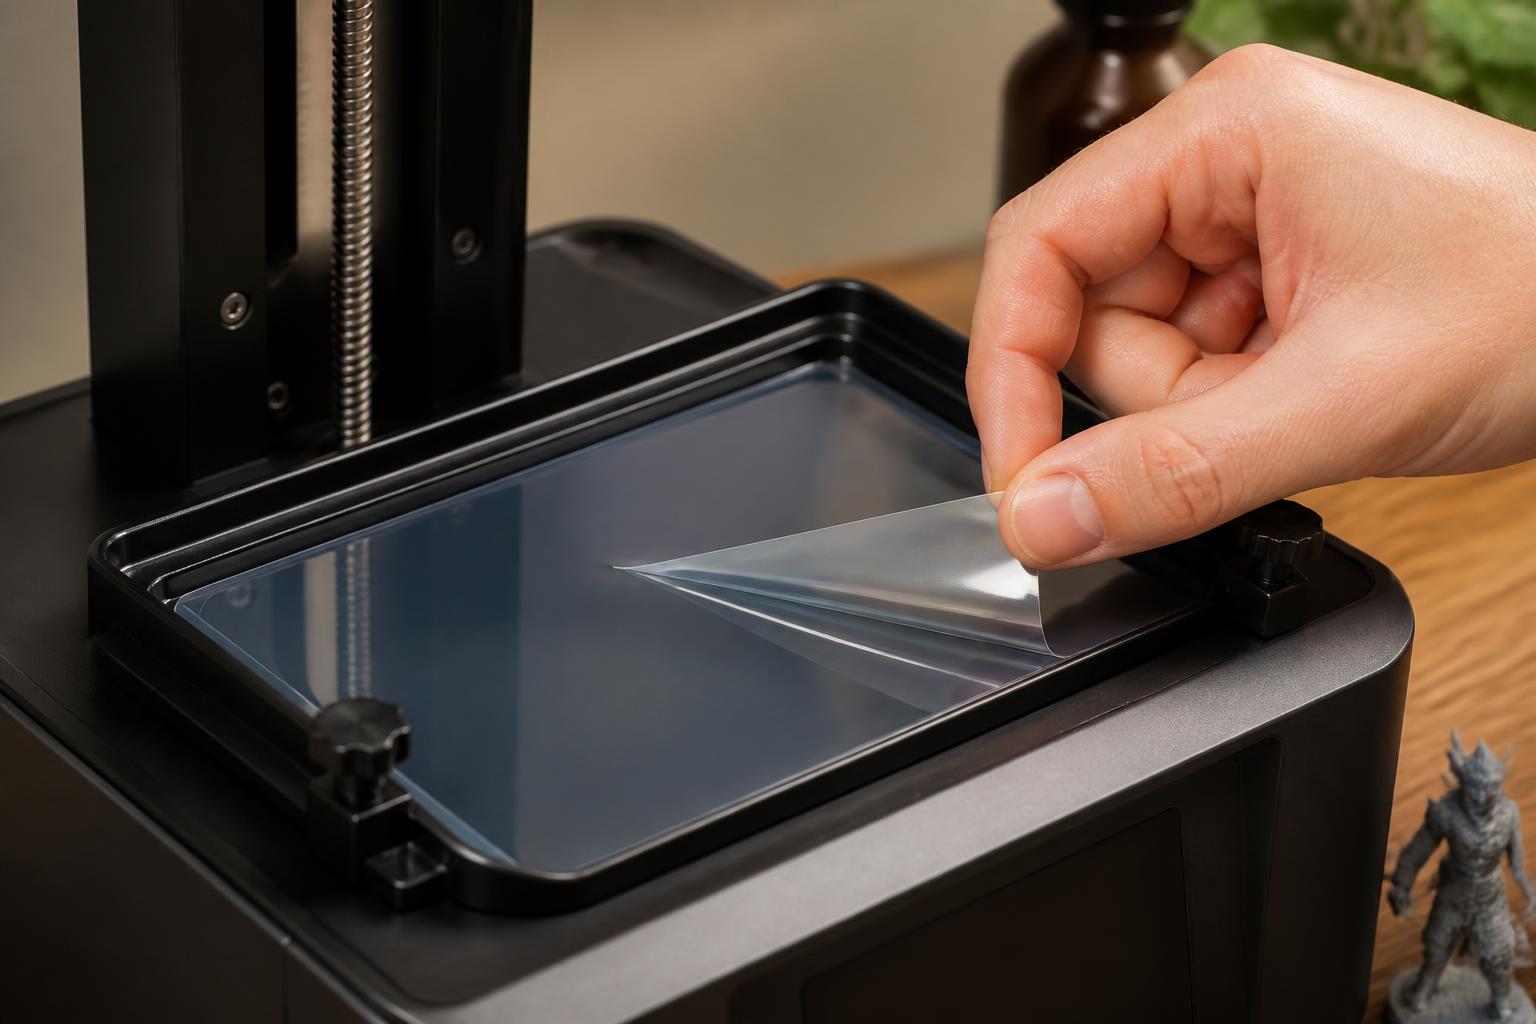
On a budget resin printer, a print failure usually means a cured layer stuck to the FEP film—which can tear the FEP or get pushed into the LCD, cracking it. Replacing the FEP is cheap ($3–$5), but replacing a cracked LCD is $40–$60. The HALOT R6 has a screen protector film included; use it and replace it on every FEP change to reduce this risk.
Resin choice changes everything
Budget printers don’t ship with high-durability resin. The standard gray or clear resin they include works for test prints, but it’s brittle—drop a miniature and it snaps. For usable parts, budget for a $30–$35/kg bottle of tough resin (like Siraya Tech Tenacious or Phrozen Tough) and mix it 70/30 with standard resin for better impact resistance without losing detail.
Verification step to check your resin compatibility: Look on the resin bottle for “405nm” in the curing wavelength spec. If it says 365nm or 385nm only, it won’t cure properly on a standard budget printer. Most budget printers are 405nm LEDs—confirm this in your printer’s spec sheet before buying resin.
When a different option is safer: If you’re printing parts that need to withstand any impact at all (functional snaps, handles, or wearable items), don’t use standard resin alone. The part will crack under light finger pressure. Switch to a tough or impact-modified resin blend, or plan to print in a more durable material from the start. Standard resin is fine for display models only.
Setting up your budget resin printer (operator flow)
Here’s the process that works for all three printers above, from unboxing to your first successful print.
Before you start: ventilation and PPE
Resin printing produces VOC fumes even with low-odor formulas. Set up the printer in a room you don’t sleep in, near a window with an exhaust fan, or run an activated carbon filter inside the enclosure. Wear nitrile gloves and safety glasses when handling liquid resin—latex gloves degrade quickly with resin contact.
Step 1: Level the build plate
1. Loosen the build plate screws (HALOT R6: single knob; Photon Mono 2: four screws; Mars 4: two knobs).
2. Place the included leveling card or a piece of regular printer paper on the LCD screen.
3. Lower the build plate until it presses firmly against the paper.
4. Tighten the screws, then raise the plate and remove the paper.
5. Run the leveling test in the printer menu.
Checkpoint: The plate should feel even across all four corners when you slide paper under each corner. If one corner is looser, re-level. If you can’t get all four corners to feel the same resistance, check that the Z-axis gantry isn’t tilted—loosen the gantry mounting screws, lower the plate, and re-tighten.
Step 2: Set your exposure times
Start with the resin manufacturer’s recommended layer exposure. For standard 405nm resin at 0.05mm layer height:
- Bottom layers: 30–40 seconds (4–6 initial layers)
- Normal layers: 2.5–3.5 seconds
- Lift distance: 5–7mm
- Lift speed: 60–80 mm/min
Likely cause of failed prints: Underexposed bottom layers cause the print to release from the build plate. If you see the print stuck to the FEP instead of the plate, increase bottom exposure by 5 seconds or add one more bottom layer. If the print sticks but the first few layers look mushy or wider than the model, reduce bottom exposure by 5 seconds.
Step 3: Prepare the resin and pour
- Shake the resin bottle for 2 minutes—pigments settle and uneven mixing causes layer banding.
- Pour through a fine mesh filter into the vat.
- Fill to about 1/3–1/2 of the vat depth. Overfilling pushes resin against the LCD when the build plate descends, causing leaks.
Step 4: Run the first print
- Slice a small test model (the included rook or a calibration block like the AmeraLabs Town).
- Save to USB, insert into the printer.
- Start the print.
Checkpoint: Watch the first 10–15 layers. You should see the build plate lift cleanly after each layer, with the model adhering to the plate and nothing stuck to the FEP. If the plate makes a loud “thunk” or you see cured resin floating in the vat, stop immediately and check leveling and exposure settings.
Step 5: Post-processing
- Remove the print using the metal spatula—slide it under the model gently to avoid gouging the build plate.
- Wash in 99% isopropyl alcohol for 3–5 minutes using a two-stage bath (dirty first, clean second).
- Remove supports with flush cutters.
- Cure under 405nm UV light for 4–6 minutes per side.
Success signal: A properly cured resin part should feel hard, not tacky, and the surface should be matte (not shiny). If it’s still sticky, increase cure time by 1–2 minutes. If it feels brittle or warped, reduce cure time or switch to a tough resin blend.
Escalation signals (when to stop troubleshooting and replace parts)
- Dark spots on the LCD: The screen is failing. Replace it.
- Resin leaking past the FEP: The FEP has micro-tears. Replace it immediately—resin on the LCD will destroy it.
- Consistent layer shifts or delamination despite correct exposure: The Z-axis screw may have debris or the stepper motor may be overheating. Clean the screw with a dry cloth, re-grease with PTFE grease, and test again. If the problem persists, the motherboard or motor may need replacement—warranty claim if within the first year.
Related questions
How much resin does a budget printer use per model?
A 28mm tabletop miniature at 0.03mm layer height uses about 4–8mL of resin depending on hollowing and supports. A 1kg bottle will yield roughly 120–250 miniatures.
Can I upgrade the screen later?
Some budget printers let you swap to a higher-resolution LCD module within the same model line (e.g., Mars 4 to Mars 4 Ultra), but a standalone screen upgrade is rarely cost-effective. It’s cheaper to sell your printer and buy the next tier up.
Do I need a curing and washing station?
No. You can wash prints in a jar of IPA with agitation and cure them in direct sunlight (10–15 minutes per side) or use a cheap UV nail lamp ($15–$20). A washing/curing station saves time and is worth the upgrade after your first 20 prints if you’re doing regular production.
What’s the best brand of budget resin for beginners?
Start with Elegoo Standard Photopolymer Resin (gray) or Anycubic Standard Resin (clear). Both are well-characterized with community profiles, cost about $20–$25/kg, and cure reliably at the exposure ranges listed above. Avoid no-name unbranded resin from discount marketplaces—inconsistent curing times cause failed prints and clogged screens.
Explore This Topic
- Back to Best Printer by Budget
- Back to sc0007
Related guides in this cluster:
- Best budget 3d printer: Top Picks & Guide
- Best budget 3d printer 2025: Top Picks & Guide
- Best inexpensive 3d printer: Top Picks & Guide

Ryan has been operating FDM 3D printers since 2017. He runs a 12-machine print farm. His daily drivers include a Bambu Lab X1 Carbon, Prusa MK4s, and Creality Ender-3 V3s that have logged over 15000 print hours. He started 3D Printer Nerd to provide structured troubleshooting guides with diagnostic order, material-specific parameters, and clear stop points.