Low-Price 3D Printers: What You Actually Get for Under $200
There is no single “best” low-price 3D printer. Under $200, every machine makes compromises. The trick is knowing which compromises you can work around and which ones will wreck your prints. Here’s a direct look at what you get, what fails most often, and three printers that deliver real value without hiding deal-breaking flaws.
What this means for your next purchase: If you primarily print PLA and PETG in small volumes (under 200×200×200 mm), a $180 printer is a fine entry point. But if you plan to print anything larger, need high-temperature filaments like polycarbonate, or expect reliable first-layer adhesion from day one, save until you can spend $250–$400. The extra $50–$100 buys a thermal-runaway-protected power supply, a strain-sensor auto-leveling system, and an all-metal hotend. It also saves hours of troubleshooting.
Low price 3d printer” />
What You Actually Get for Under $200
A sub-$200 printer buys you a basic Cartesian or bed-slinger frame, usually an acrylic or thin aluminum extrusion, a single-gear extruder, and a hotend with a PTFE-lined throat. The power supply is almost always a generic 24V unit that runs hot. The mainboard uses either A4988 or silent-ish TMC2209 stepper drivers (check the listing; many don’t specify).
| Feature | Typical Range | Real-World Trade-off |
|---|---|---|
| Build volume | 180×180×180 mm to 220×220×250 mm | Small volume limits large parts, but okay for miniatures and prototypes |
| Max print speed | 60–150 mm/s | Realistic max speed is ~60 mm/s for decent quality; faster leads to ringing |
| Bed type | Aluminum with build surface (PEI, glass sometimes) | PEI sheets are best; glass often sticks poorly without glue stick |
| Hotend temperature | Up to 260°C (PTFE-lined) | Cannot print high-temp filaments like PC or Nylon beyond 240°C safely |
Realistic mismatch to expect: Don’t plan on printing flexible filaments (TPU) with a Bowden extruder without heavy tuning. Even the direct-drive models on this list (Kobra X, Ender-3 V3 SE) require dropping print speed to 15–20 mm/s for flexible materials. If you need fast, clean flexible prints, you’ll need a geared direct-drive extruder found in printers above $300. Similarly, speed claims of 150 mm/s are marketing numbers; expect usable quality at 60 mm/s.
How to Spot and Fix the #1 Budget Printer Failure – Inconsistent Bed Leveling
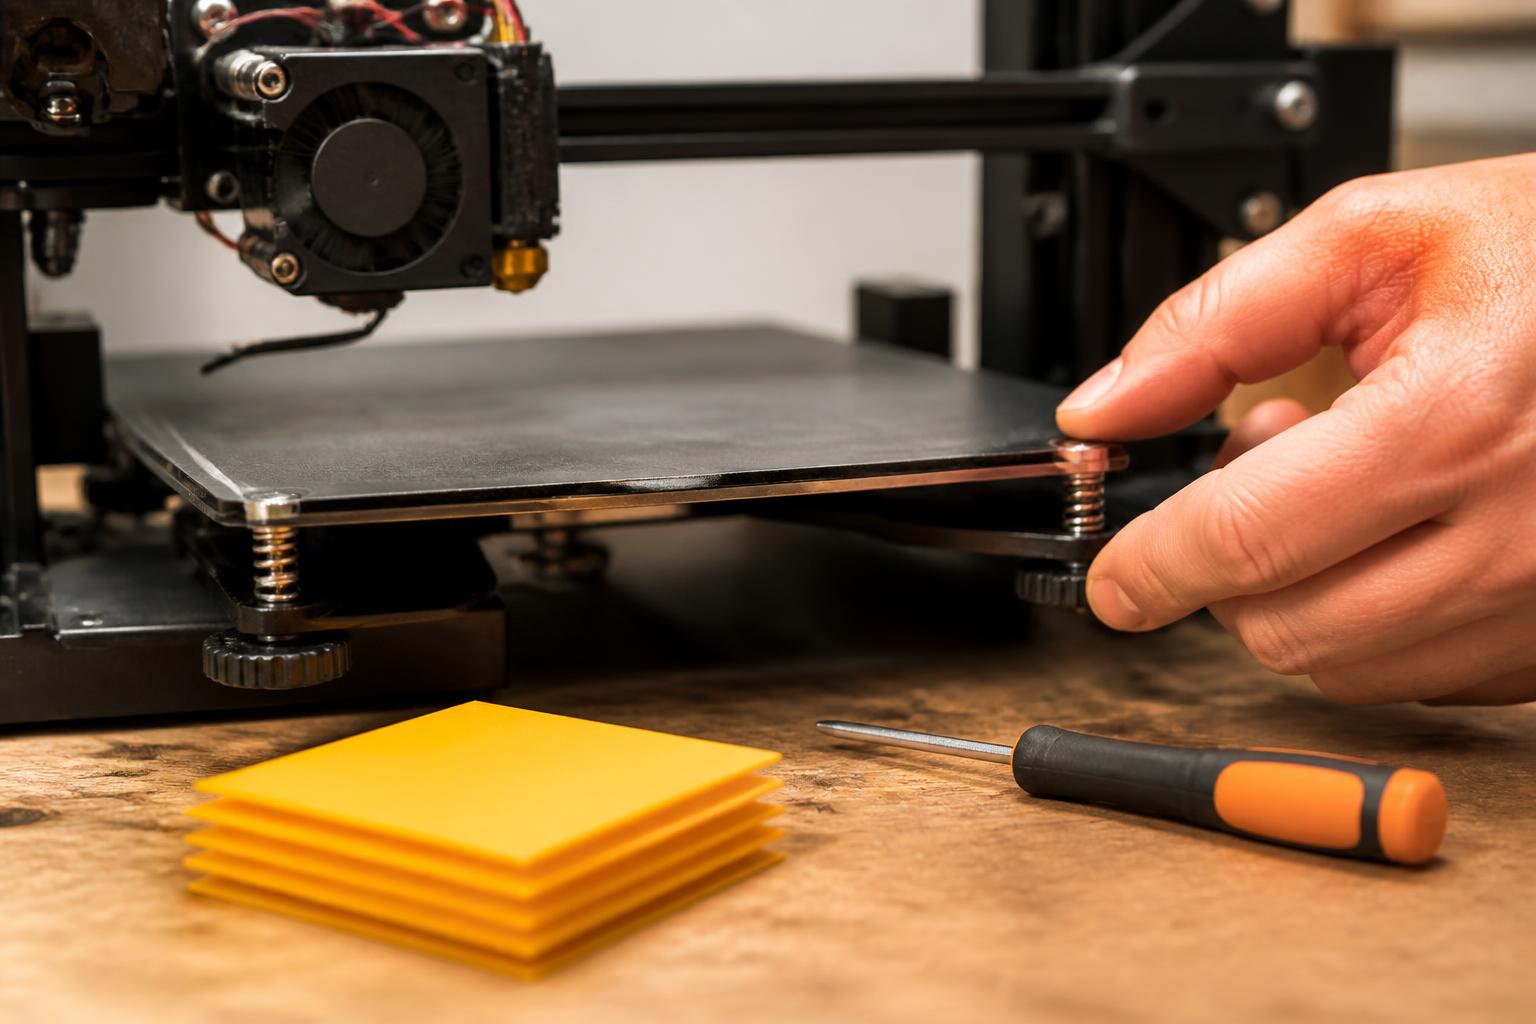
The number-one killer of cheap printers is an uneven bed. Many sub-$200 machines come with manual leveling knobs and a non-flat aluminum bed. If the bed has a dip of more than 0.2 mm across the surface, your first layer will fail on one side while squishing too much on the other.
Quick verification step on your actual machine
1. Run the auto‑leveling routine (or manually level) using the printer’s menu.
2. After the routine finishes, send `M503` via a terminal (Pronterface, OctoPrint) or navigate to the “Bed Mesh” screen on the touchscreen.
3. Look at the mesh values. Acceptable variation is ≤0.2 mm between the highest and lowest point.
4. If any corner differs from the center by more than 0.3 mm, the bed is warped beyond what the probe can compensate. On manual-level models, that means you’ll need to shim the bed with aluminum tape or buy a glass bed.
Ordered operator flow for a successful first print
1. Pre-flight check: Before your first print, use a feeler gauge (or a piece of receipt paper) to check all four corners and the center. If the gap varies by more than one full turn of the leveling knob, the bed is likely warped.
2. Run auto-level or manual level – Most budget printers include a probe (Anycubic Kobra X has strain-sensor, Ender-3 V3 SE has CR Touch clone). If yours lacks a probe, you’ll need to create a manual mesh in the slicer (e.g., Cura’s manual leveling wizard) and save it.
3. Print a first-layer test (a 100×100 mm one-layer square). Watch the extrusion: it should lay down a uniform 0.2 mm bead with no gaps and no ridges. If you see transparent patches (too high) or ripples (too low), adjust the Z‑offset in 0.05 mm increments.
4. Success check: If the first layer looks consistent across the whole square and the nozzle doesn’t drag, you’re ready for a full print. If you cannot get a uniform bead even after multiple Z‑offset adjustments, the bed may be too warped – return the printer and pick a model with a strain-sensor auto-leveling system.
5. Escalation signal: If the bed mesh shows a dip >0.5 mm and the printer is within the return window, do not try to shim it. Return it and buy a higher-quality model.
Three Budget Printers That Actually Work (and One to Skip)
Anycubic Kobra X – Best for Beginners
- Price: ~$179 (often $159 on sale)
- Build volume: 220×220×250 mm
- Key features: Strain-sensor auto-leveling, direct-drive extruder, silent steppers
- Why it works: The auto-leveling is reliable enough to skip manual mesh creation. Direct drive handles TPU well. Print quality at 60 mm/s and 0.2 mm layer height matches printers costing twice as much.
- Failure mode and what to do: The stock cooling fan is loud and prone to dying after ~200 hours. When it fails, you’ll see heat creep symptoms: filament softening in the heatbreak, under-extrusion, and clicking from the extruder. Swap it with a Winsinn 5015 blower fan ($8) before it starts rattling.
Sovol SV06 – Best for Tinkerers
- Price: ~$190 (often $180 with coupon)
- Build volume: 220×220×250 mm
- Key features: Full linear rods, dual-Z lead screws, PEI spring steel sheet, all-metal hotend (no PTFE liner)
- Why it works: The all-metal hotend reaches 300°C, letting you print PETG and even low-temperature polycarbonates. The linear rods produce very consistent Z-movement with minimal layer shift. The PEI sheet provides excellent adhesion for PLA without glue.
- Failure mode and what to do: The included silicone sock can slip and cover the heatbreak cooling fins, restricting airflow. This causes heat creep and clogs. Inspect the sock every 10 prints; if it’s loose, secure it with a zip tie or replace it (a pack of 5 socks costs $6).
Creality Ender-3 V3 SE – Best Value for Speed
- Price: ~$199 (often $179 on Amazon)
- Build volume: 220×220×250 mm
- Key features: Sprite direct-drive extruder, CR Touch auto-leveling, 300°C hotend, 80 mm/s recommended print speed
- Why it works: The Sprite extruder is a huge upgrade over older Bowden setups – less stringing, better retraction. The CR Touch probe is more robust than earlier versions. Print speed at 100 mm/s is achievable with decent quality.
- Failure mode and what to do: The Y‑axis belt tensioner uses plastic gear; it can strip if you overtighten. Overtightening causes belt grinding and layer shifts. Use the “twang test”: pluck the belt – it should resonate like a loose guitar string. If it sounds high-pitched (tight), loosen until the pitch drops slightly.
The One to Skip: Any No-Name “Upgrade” Bundle
Many sub-$120 printers on Amazon promise “upgraded” aluminum extruders and glass beds, but they ship with a warped Y‑axis gantry or a broken heater cartridge. Worst of all, these machines often lack thermal runaway protection circuits – a fire risk. If the listing doesn’t mention a brand name or model number, pass. Stick with the three listed above.
When to Spend $50 More – and When to Save It
If your budget can stretch to $250, move up to the Bambu Lab A1 Mini ($259). It prints three times faster than any sub-$200 machine with near-zero vibration, and its automatic material system (AMS) makes multi-material prints easy. Alternatively, the Sovol SV08 Max ($400) gives you a 350×350×350 mm build volume for large parts.
But if your projects rarely exceed 150×150×150 mm, and you’re okay spending a few hours tweaking the printer in the first month, a sub-$200 machine is enough. Just budget an extra $20 for a spare PTFE tube, a replacement fan, and a quality filament (don’t use the sample spool that comes with the printer – it’s often wet and full of dust).
Final practical takeaway: A $180 printer will produce good PLA and PETG parts if you verify bed flatness, replace the PTFE tube with Capricorn brand, and swap the stock fan when it starts to fail. If you want to print high-temperature materials, large parts, or use a printer that “just works” out of the box, that $70–100 jump to a Bambu Lab A1 Mini or a Sovol SV08 Max is worth every dollar.
Explore This Topic
- Back to Best Printer by Budget
- Back to sc0007
Related guides in this cluster:

Ryan has been operating FDM 3D printers since 2017. He runs a 12-machine print farm. His daily drivers include a Bambu Lab X1 Carbon, Prusa MK4s, and Creality Ender-3 V3s that have logged over 15000 print hours. He started 3D Printer Nerd to provide structured troubleshooting guides with diagnostic order, material-specific parameters, and clear stop points.