How to Clean a 3D Printer Bed: PEI Glass & Textured
A dirty print bed is the most common reason first layers fail, yet most people reach for isopropyl alcohol too often and scrub too hard. The counter-intuitive truth: aggressive solvent cleaning often makes adhesion worse over time by stripping the microscopic texture that filament actually grips. What you need is a surface-specific cleaning sequence that removes contaminants without degrading the bed material itself. Here is exactly how to do that for PEI, glass, and textured plates.
Is Your Bed Actually Dirty, or Is Something Else Wrong?
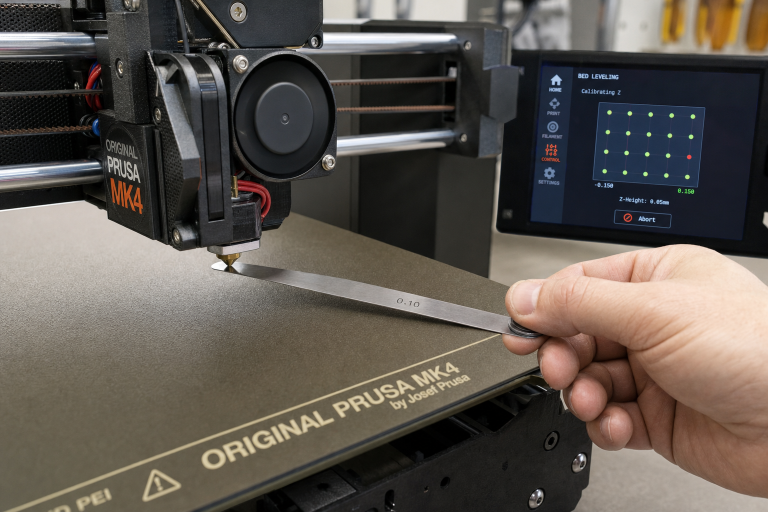
Before you clean, confirm the problem is contamination. Wipe a clean finger across the bed surface after a failed print. If you feel any residue, oil, or dust, cleaning is the right call. If the bed feels perfectly smooth and clean but prints still will not stick, your issue is more likely Z-offset, bed temperature, or a worn nozzle.
Signs that point specifically to bed contamination:
- First-layer adhesion fails in random spots, not consistently across the whole print
- Prints lift only where you routinely touch the plate to remove parts
- Adhesion gradually worsened over multiple prints without any slicer setting changes
- You see a visible fingerprint-shaped patch of poor adhesion
If your first layer fails in the same spot every time or across the entire print regardless of where you touch the bed, check your bed leveling and Z-offset before reaching for cleaning supplies.
What You Need Before You Start
Gather the right materials for your bed type. Using the wrong cleaner on the wrong surface creates more problems than it solves.
| Bed Surface | Safe Cleaners | Avoid |
|---|---|---|
| Smooth PEI (spring steel sheet) | 90%+ isopropyl alcohol, warm water + dish soap, acetone (occasional only) | Abrasive pads, glass cleaner with ammonia |
| Textured PEI / powder-coated PEI | Warm water + dish soap, isopropyl alcohol | Acetone, abrasive sponges, metal scrapers |
| Glass (plain or carborundum) | Warm water + dish soap, isopropyl alcohol, glass cleaner (ammonia-free) | Acetone on coated glass, razor blades at steep angles |
| BuildTak / PC / generic polymer sheets | Isopropyl alcohol, warm water + dish soap | Acetone, any solvent stronger than IPA |
Materials checklist:
- Lint-free microfiber cloths (paper towels leave micro-residue on PEI)
- 90% or higher isopropyl alcohol
- Unscented dish soap (fragrance additives leave a film)
- Warm water
- Clean cotton pads or foam swabs for textured surfaces
- Acetone (only for smooth PEI, and only when IPA stops working)
Step-by-Step Cleaning for Each Bed Type
Smooth PEI Sheets
Smooth PEI is the most common spring steel bed surface and also the easiest to damage with over-cleaning. The surface relies on a microscopic texture that IPA alone cannot destroy, but acetone can if overused.
Routine cleaning (after every 3–5 prints or whenever you touch the bed):
1. Let the bed cool to room temperature. Wiping a hot PEI sheet with IPA causes rapid evaporation that leaves dissolved contaminants behind instead of lifting them away.
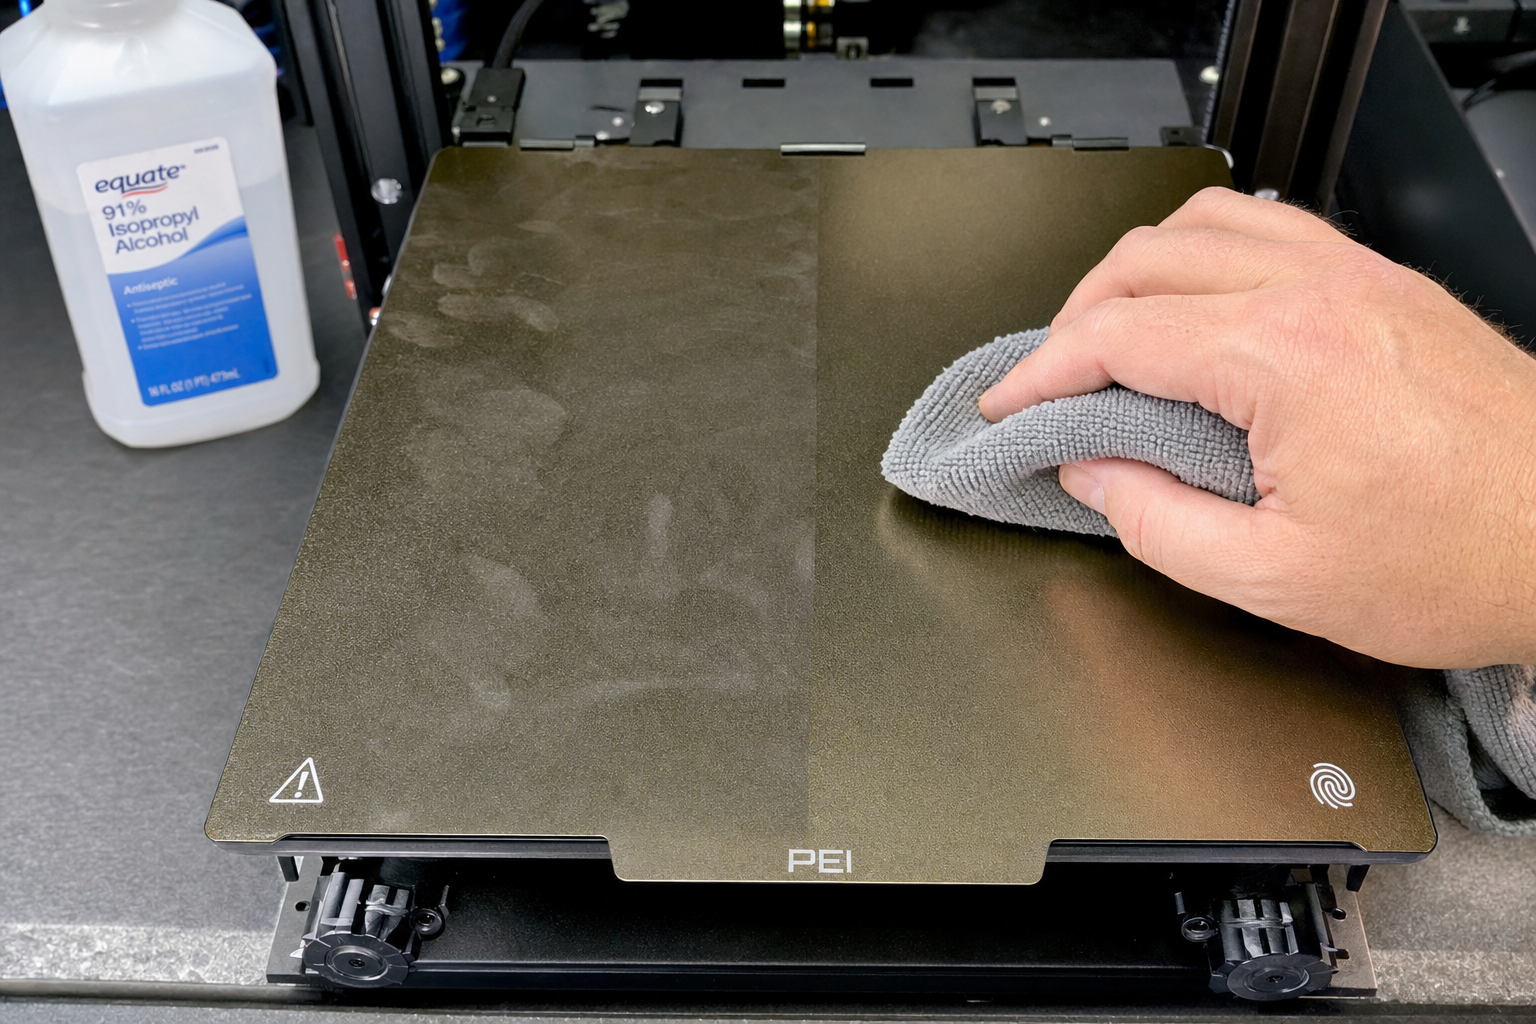
2. Apply 90%+ IPA to a lint-free microfiber cloth, not directly to the bed. A damp cloth is enough; soaking the surface just spreads oils around.
3. Wipe in one direction across the entire bed. Do not scrub in circles—that redistributes oils into a thin even layer that looks clean but prevents adhesion.
4. Flip the cloth to a dry section and wipe again to pick up any remaining residue.
5. Wait 30 seconds for any residual moisture to evaporate before heating the bed.
Deep cleaning (when IPA stops restoring adhesion):
1. Remove the spring steel sheet from the printer and take it to a sink.
2. Rinse under warm water. Apply a small drop of unscented dish soap directly to the PEI surface.
3. Scrub gently with your fingertips or a soft, clean sponge dedicated only to this task. Never use the kitchen sponge that has food oils in it.
4. Rinse thoroughly under running warm water until no soap bubbles remain. Soap residue kills adhesion just as effectively as finger oils.
5. Dry immediately with a clean lint-free cloth. Do not air-dry; water spots on PEI leave mineral deposits that act as release agents.
6. Place the sheet back on the heated bed, set the bed to 60°C for PLA, and let it heat for 2–3 minutes to drive off any remaining moisture before printing.
Acetone refresh (smooth PEI only, every few months when adhesion declines despite soap cleaning):
1. Apply a small amount of pure acetone to a lint-free cloth.
2. Wipe the entire PEI surface quickly and evenly. You are lightly etching the surface to expose fresh PEI, not stripping it.
3. Immediately follow with a warm water and dish soap wash as described above to remove the etched residue.
4. Limit acetone use to once every 2–3 months. Frequent acetone cleaning turns PEI brittle and causes it to crack or delaminate from the spring steel.
Textured and Powder-Coated PEI Sheets
Textured PEI is more fragile than it looks. The powder-coated surface has peaks and valleys that create the texture; acetone dissolves the bonding agent that holds the coating to the steel. Once the coating starts flaking off, the sheet is ruined.
Routine cleaning:
1. Use warm water and dish soap as the primary cleaning method. IPA alone often cannot reach into the texture valleys where oils settle.
2. Apply IPA with a foam swab or cotton pad for quick between-print cleaning, pressing lightly so the swab conforms to the texture.
3. Never use a metal scraper or stiff brush on textured PEI. The coating scratches off in flakes.
Deep cleaning:
1. Wash at the sink with warm water and dish soap, same as smooth PEI.
2. Use a soft-bristle toothbrush reserved only for this purpose to gently agitate the textured surface. Do not press hard; let the bristle tips do the work.
3. Rinse until no soap remains, dry thoroughly, and heat on the bed to remove residual moisture.
What to avoid completely on textured PEI:
- Acetone in any concentration
- Magic erasers or melamine sponges (they are micro-abrasives)
- Scraping with anything sharper than a plastic razor blade
Glass Beds
Glass is the most chemically resistant bed surface, but it is not indestructible. Carborundum-coated glass (like the Creality Ultrabase) has a microporous coating that traps oils and requires a different approach than bare glass.
Bare glass (standard borosilicate or tempered glass):
1. Remove the glass plate and wash with warm water and dish soap. Glass cleaner works for light dust but does not cut finger oils effectively.
2. For stubborn residue, use a fresh single-edge razor blade held at a 15–20° angle to the glass. Keep the blade flat; a steep angle scratches the glass.
3. Wipe with IPA after washing to remove any final residue.
4. Reinstall and heat to 60°C. Bare glass often needs an adhesion aid like a glue stick or hairspray; cleaning removes these, so reapply after cleaning if your process relies on them.
Coated glass (carborundum / Ultrabase-style):
1. Do not use razor blades. The coating scratches off.
2. Wash with warm water and dish soap using a soft sponge.
3. For clogged micropores, soak the plate in warm water for 10 minutes, then scrub gently with a soft sponge.
4. Wipe with IPA after drying.
5. If adhesion does not return after cleaning, the coating may be worn through. Hold the plate up to light; if you see shiny patches where the coating has worn away, the bed needs replacement or you must switch to an adhesion aid on those spots.
The Spot Everyone Misses: Bed Clips, Edges, and Underside
Contaminants migrate. Finger oils from handling the bed edges transfer to the print surface when the bed heats and expands. Dust from underneath the removable sheet gets trapped between the magnetic base and the steel sheet, creating uneven heating and tiny bumps that lift the sheet.
Check these areas during every deep clean:
- Wipe the magnetic base surface on the printer with a dry microfiber cloth before placing the steel sheet back down. Any debris sandwiched between the magnet and sheet creates high spots.
- Clean the edges and underside of removable sheets with IPA. When you flex the sheet to remove a print, your fingers deposit oils exactly where the next print’s purge line or skirt will sit.
- Inspect bed clips on glass beds for rust or debris. Rust particles that flake onto the glass create adhesion dead zones.
Success Check: Is Your Bed Clean Enough to Print?
After cleaning, run this verification before committing to a long print:
1. Heat the bed to your normal printing temperature for the filament you use.
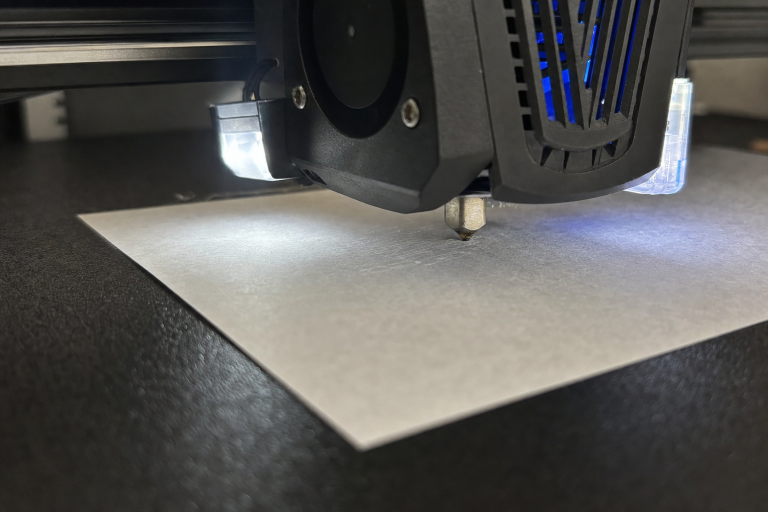
2. Wipe a clean dry finger lightly across the print area. It should feel completely smooth with no slick spots.
3. Print a single-layer test square that covers the areas where you normally place parts. A 50 mm square, 0.2 mm thick, printed at your normal first-layer speed and temperature works well.
4. Remove the square and inspect the bottom surface. It should be uniformly smooth with no gaps, bubbles, or thin patches.
5. If the test square shows inconsistent adhesion, repeat the cleaning process with dish soap rather than adding more IPA.
When to Stop Cleaning and Replace the Bed
Cleaning cannot fix a worn-out bed surface. Stop troubleshooting and order a replacement when you see any of these clear failure thresholds:
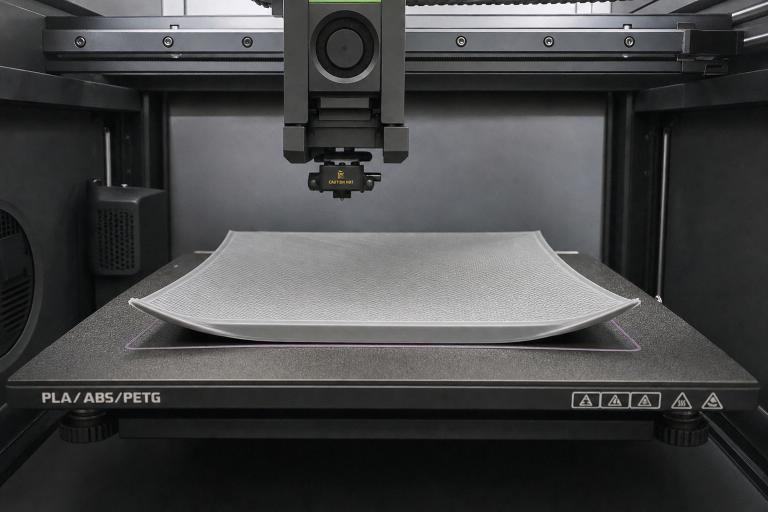
- Smooth PEI: Visible bubbles, cracks, or peeling at the edges that grow with each heat cycle. If the PEI lifts enough to catch a fingernail, the bond to the steel is failing and the sheet will only get worse.
- Textured PEI: Bare steel showing through the coating in any spot larger than a few millimeters. Once the coating breaches, flaking accelerates and the exposed steel does not adhere filament reliably.
- Glass: Deep scratches you can feel with a fingernail, or coated glass with shiny worn patches larger than a centimeter. A single deep scratch across the print area creates a permanent adhesion fault line.
- Any surface: Adhesion fails consistently in the same area after a full deep-clean cycle with dish soap, indicating a permanent low spot, coating failure, or subsurface contamination that cleaning cannot reach.
For removable spring steel sheets, replacement is straightforward and costs $15–40 depending on the brand. For fixed beds or proprietary coated glass, check whether the manufacturer sells a replacement surface or if a generic PEI sheet adhered to the existing plate is a viable fix. If you have run the full deep-clean sequence twice with no improvement and the bed shows any of the physical damage signs above, further cleaning is wasted effort—replace the surface and move on.
Explore This Topic
Related guides in this cluster:
- 3D Printer Bed Temperature Guide by Material
- 3D Print Lifting Off Bed at Corners? Complete Fix Guide
- Brim vs Raft vs Skirt: When to Use Each for 3D Printing
Ryan has been operating FDM 3D printers since 2017. He runs a 12-machine print farm. His daily drivers include a Bambu Lab X1 Carbon, Prusa MK4s, and Creality Ender-3 V3s that have logged over 15000 print hours. He started 3D Printer Nerd to provide structured troubleshooting guides with diagnostic order, material-specific parameters, and clear stop points.