PETG Filament Guide: The Sweet Spot Material for 3D Printing
PETG is the filament you reach for when PLA is too brittle and ABS is too frustrating. It sits in the sweet spot between the two: nearly as easy to print as PLA, with much of the impact resistance and temperature tolerance of ABS, and none of the styrene fumes. For most functional prints, mechanical parts, and outdoor projects that don’t need extreme heat resistance, PETG is the right default choice.
It isn’t a magic material, though. The same properties that make PETG tough also make it prone to one specific failure mode that catches even experienced operators off guard: over-adhesion that destroys build surfaces. Below we’ll cover exactly how to detect that early, prevent it, and walk through a complete setup flow that turns PETG from a frustrating stringy mess into your most reliable filament.
The One Failure Mode That Catches Everyone: Build Surface Damage
PETG bonds aggressively to many common print surfaces. Unlike PLA, which releases cleanly, PETG can fuse so tightly to PEI, glass, or BuildTak that removing a print tears chunks out of the bed. This isn’t a theoretical risk—it’s the number one reason operators with otherwise dialed-in printers suddenly need a new build plate.
How to detect the risk before it happens: If your first layer goes down glassy-smooth with zero visible texture and you hear a sharp cracking sound during print removal, you’re in the danger zone. A properly released PETG print should pop off with moderate force, not require a scraper and prayer.
The prevention is simple but non-negotiable: Always use a release layer on smooth PEI and bare glass. A thin coat of glue stick, a layer of blue painter’s tape, or a dedicated PETG-safe surface like textured PEI or Garolite (G10) prevents the permanent bond. Hairspray works in a pinch but is less reliable. If you’re printing PETG on smooth PEI without any barrier, you’re gambling with your build plate every single print.
What You Need Before You Print PETG
Getting PETG right starts before the first layer. Assemble these items and conditions to avoid the most common early failures.
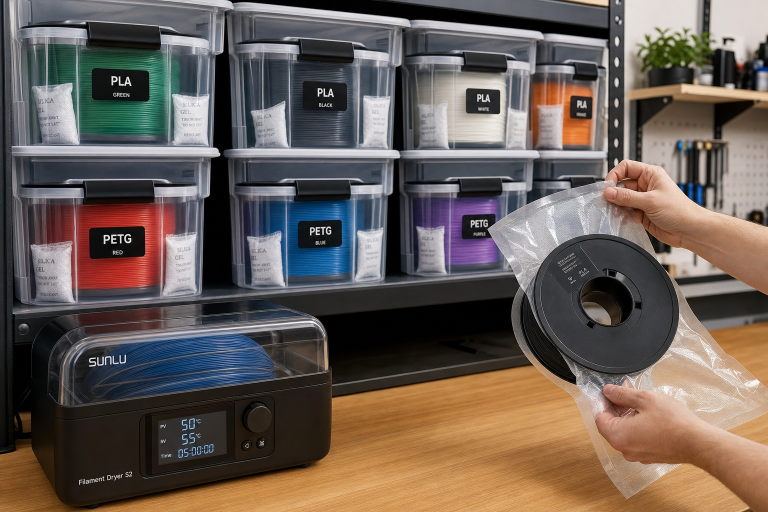
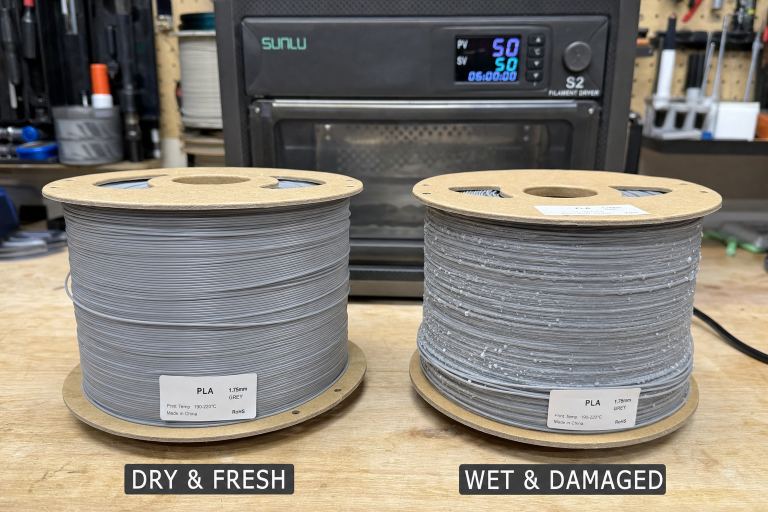
- Filament dryer or food dehydrator: PETG absorbs moisture fast. Even fresh-from-the-bag spools often need drying. Set a dryer to 60–65°C for 4–6 hours. A food dehydrator works if it holds temperature consistently. Do not use an oven unless you’ve verified its accuracy with a separate thermometer—overshooting by 10°C can fuse the spool.
- Release agent: Glue stick (plain PVA), blue painter’s tape, or a textured PEI sheet. If you print PETG regularly, a textured PEI sheet eliminates the barrier step entirely and produces a clean bottom finish.
- Temperature tower gcode: A pre-sliced temperature tower for your printer saves hours of guesswork. You’ll use it to lock in the best nozzle temperature for each brand.
- Calibration cube or small test model: A 20 mm cube or a simple cylinder lets you verify layer adhesion, stringing, and dimensional accuracy before committing to a long print.
- Dry storage container: A sealed bin with desiccant. Indicating silica gel that changes color tells you when it’s time to recharge.
Bed surface compatibility at a glance:
| Surface | Safe Without Barrier? | Notes |
|---|---|---|
| Textured PEI | Yes | PETG releases cleanly once cooled. The gold standard. |
| Smooth PEI | No | Requires glue stick or tape. Direct contact risks permanent fusion. |
| Glass (bare) | No | PETG can chip glass during removal. Always use a barrier. |
| Garolite (G10) | Yes | Excellent natural release. Less common but highly effective. |
| Blue painter’s tape | Yes | Acts as its own barrier. Replace when worn. |
| BuildTak/similar | Risky | Some formulations release fine; others tear. Test on a small print first. |
Step-by-Step: From Spool to Solid Print
Follow this sequence every time you switch to a new PETG spool or brand. It catches the variables that cause 90% of PETG print failures.
1. Dry the filament
Place the spool in a dryer at 60–65°C for at least 4 hours. If you hear popping from the nozzle during a print, stop immediately—the filament is wet, and continuing risks a partial clog. Dry it before proceeding.
2. Prepare the bed
Choose your surface. If it’s smooth PEI or bare glass, apply a thin, even layer of glue stick or a strip of blue tape. Let the bed heat to 80°C before applying glue—it spreads more evenly. For textured PEI or Garolite, wipe with isopropyl alcohol and skip the barrier.
3. Set baseline temperatures
Start with these numbers and adjust based on the temperature tower:
- Nozzle: 240°C
- Bed: 80°C
- No enclosure needed, but shield the printer from drafts. A cardboard box around the printer is enough if you notice corner lifting.
4. Adjust the Z-offset for PETG
PETG does not like being squished into the bed the way PLA does. If your first layer looks pressed flat with ridges between lines, you’re too close. Back off by 0.05–0.1 mm until the extrusion sits on top of the bed with a rounded profile. A live Z-offset tune during a first-layer test print is the fastest way to dial this in.
5. Print a temperature tower
Run a tower that spans 230–250°C. Look for the segment with the best balance of layer adhesion, surface finish, and minimal stringing. Write that temperature down—it’s your baseline for this spool.
6. Tune retraction
PETG is stickier than PLA and strings more. Start with these retraction values and adjust from a retraction test print:
- Bowden setups: 4–6 mm distance, 25–40 mm/s speed
- Direct drive: 1–2 mm distance, 25–35 mm/s speed
If stringing persists after tuning, the filament is likely still damp. Dry it again before chasing retraction settings endlessly.
7. Print a calibration cube
A 20 mm cube reveals layer adhesion, dimensional accuracy, and surface finish. Squeeze it firmly across the layer lines. If it cracks along a layer line, increase nozzle temperature by 5°C and try again. If the cube feels solid and the surface is glossy to satin, your settings are ready for real prints.
When to Stop Troubleshooting and Escalate
Most PETG problems are solvable with drying, Z-offset, and temperature adjustments. But some situations mean you should stop self-troubleshooting and either discard the spool or check your hardware.
Stop and discard the spool if:
- You hear popping after drying at 65°C for 6 hours. The filament may be degraded beyond recovery.
- The filament surface feels sticky, discolored, or has visible bubbles even before printing. This indicates chemical breakdown.
Stop and inspect your printer hardware if:
- You’ve applied a release layer and still see bed damage. Your Z-offset may be too low, or the nozzle may be dragging. Re-level the bed and check for a warped build plate.
- Clogs happen repeatedly after drying and using correct temperatures. A partial clog from degraded PTFE tube or a heat creep issue may be the root cause. Inspect the hotend and PTFE liner; if the tube is discolored or deformed, replace it before printing again.
- You smell a sharp, burnt odor or see smoke. Shut down the printer immediately. This can indicate a failing heater cartridge or thermistor, not a filament problem. Do not continue until the electrical fault is resolved.
If you’ve worked through the entire step-by-step flow twice with no improvement, and the spool isn’t clearly defective, contact the filament manufacturer’s support with photos of the failed prints and your settings. Some batches have out-of-spec diameter or additive issues that no amount of tuning can fix.
Which PETG Brand Should You Buy?
PETG quality varies significantly. Diameter consistency, factory drying, and additive packages separate reliable brands from frustration generators.
Top tier (consistent ±0.02 mm, factory-dried, predictable):
- Prusament PETG
- Hatchbox PETG
- Overture PETG
- Polymaker PolyLite PETG
These print predictably out of the box and rarely arrive wet. They cost more per kilogram but eliminate the “is it the filament or my settings?” variable.
Mid tier (good value, may need drying, occasional diameter variance):
- eSun PETG
- Sunlu PETG
- Amazon Basics PETG
- Inland PETG (Micro Center)
These work well once dried and tuned. They’re the practical choice for bulk functional prints where cosmetic perfection isn’t required. Budget for a dryer if you go this route.
Budget tier (inconsistent, expect tuning and drying):
- No-name brands on Amazon or AliExpress
- Clearance or mystery PETG
The cost savings disappear quickly when you factor in failed prints, clogs from diameter swings, and the time spent chasing settings that change mid-spool. Only buy these if you enjoy the tuning process itself.
When PETG Is the Wrong Material
PETG is versatile but not universal. It’s the wrong choice for these specific scenarios:
- High-temperature applications above 70°C: PETG’s glass transition temperature is around 80–85°C, but it softens and deforms under load well before that. For car interior parts, under-hood components, or anything exposed to boiling water, use ABS (up to ~100°C), ASA, or polycarbonate instead.
- Fine-detail miniatures and display models: PETG’s natural gloss and slight stringing make it a poor choice for high-detail aesthetic prints. PLA or resin produce sharper details and paint more easily.
- Flexible or impact-dampening parts: While PETG is tougher than PLA, it’s not flexible. For parts that need to bend repeatedly or absorb shock, TPU is the correct material.
- When you need a perfectly matte, sandable surface: PETG sands poorly. It gums up sandpaper and doesn’t produce the clean matte finish that PLA or ABS achieve with post-processing.
Success Check: Is Your Print Actually Good?
Before committing to a large, multi-hour print, run a calibration cube or a 20 mm test cylinder and confirm these five points:
1. Clean layer lines with no gaps, bubbles, or zits.
2. No thick stringing between features. A few wispy hairs are acceptable; thick strands indicate wet filament or excessive temperature.
3. The bottom surface releases with moderate force and shows the texture of your build plate, not torn filament or gouges.
4. Layer adhesion that survives a firm squeeze test without cracking along layer lines.
5. A glossy to satin finish. A matte, rough surface means printing too cold; excessive gloss with blobs means too hot.
If all five check out, your PETG setup is dialed in and ready for production.
FAQ
Can PETG be used for food-safe containers?
PETG as a raw material is food-safe and commonly used in water bottles and food packaging. However, 3D-printed PETG objects are not food-safe due to layer lines creating bacteria-trapping crevices and the potential for brass nozzle lead contamination. For decorative cookie cutters or single-use items, the risk is low. For repeated food contact, coat the print with a food-safe epoxy sealant.
Why is my PETG print so stringy no matter what I do?
Persistent stringing that doesn’t respond to retraction tuning is almost always wet filament. Dry the spool before making further adjustments. If drying doesn’t help, reduce your nozzle temperature by 5°C increments—PETG strings more aggressively at the upper end of its temperature range.
Do I need an all-metal hotend for PETG?
No. PETG prints safely at 230–250°C, which is within the safe range for PTFE-lined hotends. The PTFE degradation point is around 240–250°C with prolonged exposure, so staying at or below 240°C on a PTFE-lined hotend is prudent. An all-metal hotend removes this concern but is not required.
How does PETG compare to PET?
PETG is glycol-modified PET. The glycol addition reduces crystallinity, which makes it printable at lower temperatures and prevents the extreme brittleness of pure PET. Raw PET filament exists but is far more difficult to print and offers no practical advantage for most users.
Explore This Topic
- Back to FDM Filaments
- Back to Complete 3D Printer Filament & Material Guide
Related guides in this cluster:
- 3D Printer Bed Temperature Guide by Material
- PLA vs PETG vs ABS vs TPU: Complete Filament Comparison
- Layer Shift: Causes & Complete Fix Guide for 3D Printing
Ryan has been operating FDM 3D printers since 2017. He runs a 12-machine print farm. His daily drivers include a Bambu Lab X1 Carbon, Prusa MK4s, and Creality Ender-3 V3s that have logged over 15000 print hours. He started 3D Printer Nerd to provide structured troubleshooting guides with diagnostic order, material-specific parameters, and clear stop points.