Layer Shift: Causes & Complete Fix Guide for 3D Printing
The most likely cause of a layer shift is a mechanical obstruction or loss of synchronization between the stepper motor and the moving axis—not a slicer bug. A layer shift looks like a clean, horizontal stair-step in your print where every layer above the shift is offset by a consistent amount in one direction. If the shift repeats at the same height across multiple prints, you are almost certainly dealing with a mechanical bind, loose belt, or overheating stepper driver, not a random glitch. This guide walks through the checks and fixes in order of likelihood, from a 30-second visual inspection to part replacement decisions.
Quick Visual Triage: What the Shift Pattern Tells You
Before touching any settings, read the physical evidence on the failed print. The direction, repeatability, and height of the shift narrow the cause faster than any checklist.
Single shift, one direction only (X or Y): The toolhead or bed hit a physical obstruction during travel. Look for a curled-over section of the print, a blob on the nozzle that caught an edge, or a cable bundle that snagged on the frame at that Z height. This is the most common cause on Cartesian and CoreXY printers.
Multiple shifts at regular intervals: A repeating shift every few millimeters of Z height points to a mechanical bind in the Z-axis lead screw or a bent lead screw that tilts the gantry, causing the nozzle to strike the print. On bedslingers, check whether the Y-axis belt skips when the bed accelerates at the same position each layer.
Shift that drifts gradually across multiple layers: This is a classic sign of an overheating stepper driver. As the driver heats up, it begins missing steps intermittently. The shift may start small and worsen as the print progresses. Touch the stepper motor and driver board area carefully after a failed print—if either is too hot to hold a finger against for more than a few seconds, heat is your root cause.
Shift only on tall, narrow prints: Tall parts act as levers. As the print grows taller, the nozzle can catch on a slight warp or curl at the top edge, and the part flexes enough to skip steps before the nozzle clears it. This is a bed adhesion and part-cooling problem disguised as a layer shift.
Ordered Quick Checks: Easiest to Most Involved
Work through these in sequence. Each check includes a concrete pass/fail observation so you know whether to move on or stop and fix.
1. Belt Tension (30-Second Check)
A loose belt allows the pulley to spin inside the belt teeth during rapid direction changes, producing a clean shift without any grinding noise.
- Pass: Pluck the belt like a guitar string. It should produce a low, resonant twang around 50–60 Hz on X and Y axes for most printers. If it sags visibly or produces a dull thud, it is too loose.
- Fix: Tighten the tensioner until the belt deflects no more than 2–3 mm under moderate finger pressure at the longest unsupported span. On printers without tensioners, such as older Ender 3 models, loosen the idler bracket bolts, pull the bracket outward firmly, and retighten.
- Do not overtighten: An over-tightened belt increases friction and wears idler bearings prematurely. If the axis feels notchy when moved by hand with the motors disengaged, back off slightly.
2. Grub Screws on Drive Pulleys (2-Minute Check)
A loose grub screw on the stepper motor pulley is the most overlooked cause of intermittent layer shifts. The pulley can slip on the motor shaft during high-acceleration moves but appear tight when stationary.
- Pass: Remove the belt, grip the pulley with pliers (protect the teeth with a cloth), and attempt to rotate it on the motor shaft. Zero rotational play is acceptable.
- Fix: Locate the grub screw or screws on each pulley. Most pulleys have two set screws at 90 degrees. Tighten both against the flat of the motor shaft using the correct-size hex key. One screw must seat directly on the flat—if it sits on the curved portion of the shaft, it will loosen again within hours of printing.
- Verification: Mark the pulley and shaft with a paint pen or permanent marker line. Run a test print and check that the marks remain aligned.
Branch point: what to do if the marks have moved after a test print. If the witness marks no longer line up but the grub screws still feel tight, the screw is likely bottoming out on the shaft without actually clamping it. Remove the screw entirely, check for debris in the hole, and reinstall it with a small drop of medium-strength threadlocker (blue Loctite). Let the threadlocker cure for the manufacturer-recommended time before running the next print. If the pulley still slips after threadlocker, the pulley bore or motor shaft flat may be worn—replace the pulley and recheck the shaft for visible rounding before reinstalling.
3. Cable and Wire Harness Clearance (Visual Check)
A cable bundle or Bowden tube that catches on the frame, top rail, or spool holder at a specific Z height will cause a shift at exactly that height every time.
- Pass: Manually move the toolhead and bed through their full range of motion while watching all cable chains, wire looms, and the Bowden tube. Nothing should snag, stretch tight, or wrap around a frame member.
- Fix: Re-route cables so they form a smooth arc that does not contact the frame at any position. A printed cable chain or a simple Velcro strap to gather loose wires often solves this permanently.
4. Stepper Driver Current (Requires Multimeter or Firmware Access)
Under-current stepper drivers cause missed steps under load. Over-current drivers overheat and enter thermal shutdown intermittently.
- Pass: Reference your mainboard’s stepper driver specifications. For TMC2208 or TMC2209 drivers in UART mode, X and Y run current typically ranges from 580–650 mA for NEMA 17 motors on mid-size printers. For older A4988 drivers, Vref measured at the potentiometer should fall between 0.58 V and 0.72 V for most stock motors.
- Fix: Adjust Vref or firmware run current in small increments of 0.05 V or 50 mA. Increase if motors skip under light load; decrease if motors or drivers are too hot to touch after 10 minutes of printing.
- Stop signal: If adjusting current does not resolve the shift and drivers remain hot, the driver cooling is inadequate. Add a fan directed at the mainboard before increasing current further.
Mechanical Causes That Mimic Slicer Problems
Many operators waste time adjusting jerk and acceleration settings when the real problem is mechanical. These three issues produce shifts that look slicer-related but are not.
Binding linear bearings: A dry or contaminated linear bearing creates uneven friction. The stepper motor overcomes the bind on slow moves but skips steps when the axis reverses direction quickly. Symptom: the shift always occurs on direction changes, not during long straight moves. Fix: clean the linear rail or rod with isopropyl alcohol and re-lubricate with a light PTFE or lithium grease. Run the axis back and forth by hand—resistance should feel uniform across the full travel.
Bent Z-axis lead screw: A bent lead screw tilts the X gantry slightly as it rises, lowering one side of the nozzle into the print. The nozzle strikes the part, the stepper skips, and a shift appears. Symptom: the shift always happens at the same Z height and only on one side of the print. Fix: remove the lead screw, roll it on a flat surface to check for wobble, and replace if visibly bent. A flexible coupler between the motor and lead screw can compensate for minor misalignment but will not fix a bent screw.
Loose hotend or toolhead mounting: If the entire hotend assembly can rock slightly in its mount, the nozzle position shifts under the force of extrusion pressure changes. Symptom: small, inconsistent shifts that do not repeat at the same height. Fix: tighten all hotend mounting screws while the hotend is at printing temperature, since thermal expansion changes the clamping force. Check the eccentric nuts on V-wheel carriages—the toolhead should move without play but not bind.
Slicer Settings That Actually Cause Layer Shifts (and Their Limits)
Slicer settings cause layer shifts far less often than mechanical issues, but when they do, the fix is specific and measurable.
Travel Speed and Acceleration
Excessive travel speed causes the stepper to skip when the move requires more torque than the motor can deliver at that speed. This is especially common on heavy bedslingers where the Y-axis must accelerate the entire bed mass.
- Likely threshold: Travel moves above 200 mm/s on a stock Ender 3 or similar bedslinger often induce skipped steps, particularly on the Y-axis. On CoreXY printers, travel speeds above 300 mm/s require well-tuned input shaping and adequate stepper current.
- Fix: Reduce travel speed to 150 mm/s and travel acceleration to 1000 mm/s² as a safe baseline. Increase in 25 mm/s increments only after verifying shift-free prints.
- Verification: Print a tall, narrow test object such as a 150 mm tower with a 20×20 mm base at the new settings. No shift at full height confirms the speed is safe.
Combing Mode and Avoid Printed Parts
Combing keeps the nozzle within already-printed areas during travel moves. If combing is set to “Not in Skin” or disabled entirely, the nozzle crosses open space and can strike a curled edge on the return path.
- Fix: Set combing mode to “Within Infill” or “All” in Cura, or the equivalent in PrusaSlicer or Bambu Studio. This adds minimal print time and eliminates the most common nozzle-strike scenario.
- When combing is not enough: For tall, thin parts, also enable Z-hop during travel moves. A Z-hop of 0.2–0.4 mm, roughly one to two layer heights, lifts the nozzle clear of the part. Do not exceed 0.5 mm unless you are printing flexible filament—excessive Z-hop introduces stringing and slows the print.
Infill Pattern and Over-Extrusion
Grid infill crosses itself on every layer, creating raised intersections where the nozzle deposits extra material. On subsequent layers, the nozzle can strike these high spots and skip a step.
- Fix: Switch to Gyroid or Cubic infill, which do not self-cross on the same layer. If you must use Grid infill, reduce flow rate by 2–3% or enable “Infill Before Walls” to hide any over-extrusion inside the perimeter.
- Verification: Run a fingernail across the top infill surface mid-print on a paused print. If you feel distinct ridges at intersection points, over-extrusion is present and a strike is likely on taller layers.
| Setting | Safe Starting Value | When to Increase | Stop Signal |
|---|---|---|---|
| Travel speed | 150 mm/s | Only after 3+ shift-free tall prints | Shifts return at any higher speed |
| Travel acceleration | 1000 mm/s² | Increase in 250 mm/s² steps | Motor makes clicking sound during travel |
| Z-hop height | 0.2–0.4 mm | Increase to 0.5 mm for curled edges | Visible stringing increases |
| Stepper driver current | Manufacturer spec | +50 mA if skipping persists | Driver or motor too hot to touch |
| Belt tension | 2–3 mm deflection | Tighten if deflection exceeds 3 mm | Axis feels notchy when moved manually |
Material-Specific Shift Triggers
Filament choice changes the shift-risk profile of an otherwise well-tuned printer.
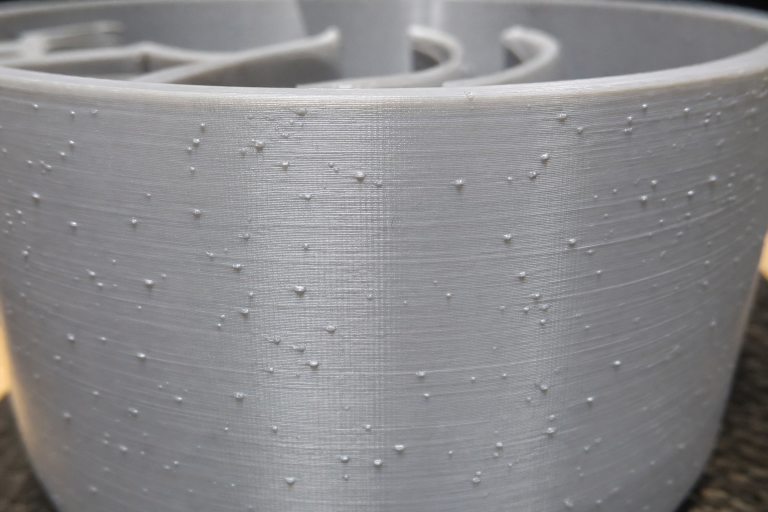
PETG: PETG tends to accumulate on the nozzle as a sticky blob that eventually deposits on the print, creating a high spot the nozzle strikes on the next pass. A silicone sock on the heat block reduces buildup. Wipe the nozzle clean with a brass brush before each PETG print.
Flexible TPU/TPE: Flexible filaments compress in the extruder and release unevenly, causing intermittent over-extrusion bumps. Print TPU at 20–30 mm/s maximum and disable all travel moves that cross open perimeters. A direct-drive extruder is strongly preferred—Bowden setups struggle to control filament compression and increase shift risk.
Wet filament (any material): Moisture in filament turns to steam in the hotend, causing irregular extrusion and small blobs on the print surface. These blobs become strike points. Dry filament at the manufacturer-recommended temperature, typically 45–55°C for PLA and 65°C for PETG, for 4–6 hours before printing if the spool has been open for more than a week in a humid environment.
When to Stop Self-Troubleshooting and Escalate
Some layer shift causes cannot be fixed with adjustments or settings changes. Stop and escalate if you encounter any of the following concrete thresholds.
The shift persists after verifying belt tension, grub screws, cable clearance, and driver current. A mainboard with a failing stepper driver chip can produce intermittent shifts that no setting change resolves. If you have confirmed all four mechanical checks pass and the shift still occurs on a simple calibration cube, the driver chip itself is likely damaged. Replace the mainboard or the individual driver if your board uses socketed drivers.
The stepper motor itself clicks or vibrates without moving the axis. This indicates a damaged motor winding or a short in the motor cable. Test by swapping the X and Y motor connectors at the mainboard—if the problem follows the motor, replace the motor. If it stays on the same axis, the driver or cable is at fault. Do not continue printing with a clicking motor; the missed steps can cause the nozzle to crash into the bed or gantry and cause further mechanical damage.
You have adjusted Vref or current multiple times and the driver still overheats to the point of thermal shutdown within 10 minutes of printing. This is not a settings problem—the mainboard cooling is inadequate for your enclosure or ambient temperature, or the driver itself has internal damage. Add a dedicated fan directed at the mainboard or replace the mainboard with a model that has better thermal design. Continuing to run an overheating driver risks permanent damage to the stepper motor as well.
The shift occurs only on one specific model file and never on test towers or calibration prints. A corrupted G-code file can contain erroneous move commands that no hardware fix will resolve. Re-slice the file and reprint. If the shift disappears, the original G-code was the problem. If the shift remains after re-slicing, the model geometry itself may have errors—run the STL through a repair tool such as Windows 3D Builder or Netfabb before slicing again.
Prevention: Settings and Maintenance That Stop Recurrence
Once you have resolved the immediate shift, these practices prevent it from returning.
- Mark your pulleys: A paint-pen witness mark on every drive pulley and motor shaft lets you spot a loosening grub screw before the next shift wastes a full print.
- Belt tension check every 50 print hours: Belts stretch slightly as they wear in. A 30-second pluck test catches tension drift early, before it causes a shift.
- Clean and lubricate linear rails every 200 print hours: Dust and filament debris contaminate bearing grease. Wipe rails clean and apply fresh lubricant on a regular schedule. Skipping this maintenance leads to the binding that produces direction-change shifts.
- Print a temperature tower for every new filament brand or type: The optimal print temperature minimizes oozing and blob formation, which are the primary non-mechanical triggers for nozzle strikes. A temperature tower costs less than an hour of print time and prevents hours of failed prints.
- Enable Z-hop on tall prints by default: A 0.2 mm Z-hop adds negligible time and acts as insurance against part curl and nozzle strikes on prints taller than 100 mm.
Layer shifts are frustrating because they waste hours of print time, but they are also one of the most diagnosable failures in 3D printing. The shift itself tells you which axis failed, and the pattern tells you whether the cause is mechanical, thermal, or settings-related. Start with the belt and pulley check, verify cable clearance, and only then adjust slicer settings or stepper current. If the shift survives all of these checks, the mainboard or stepper motor is the next component to investigate.
Explore This Topic
- Back to Print Quality Defects
- Back to 3D Printing Troubleshooting Master Guide
Related guides in this cluster:
- 3D Print Blobs & Zits: Retraction & Coasting Fix Guide
- Z-Banding: Diagnose & Fix Inconsistent Layers
- Ghosting & Ringing: How to Eliminate Surface Artifacts
Ryan has been operating FDM 3D printers since 2017. He runs a 12-machine print farm. His daily drivers include a Bambu Lab X1 Carbon, Prusa MK4s, and Creality Ender-3 V3s that have logged over 15000 print hours. He started 3D Printer Nerd to provide structured troubleshooting guides with diagnostic order, material-specific parameters, and clear stop points.